Description
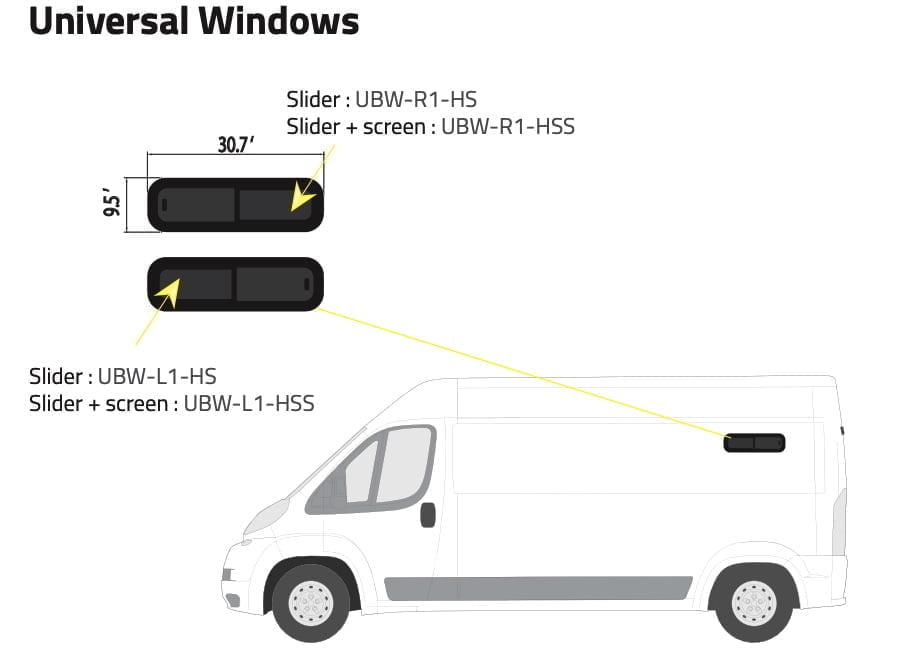
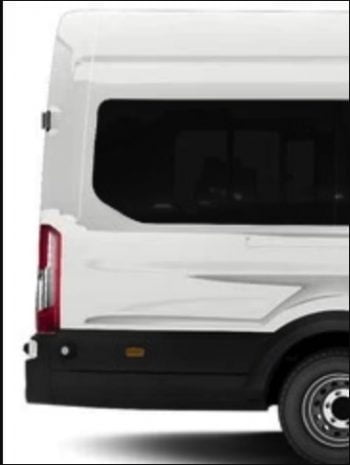
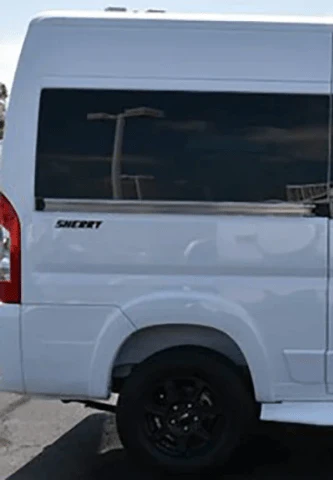
This AMA universal half-slider bunk window is an a great option for the bed/bunk area of your van. The opening has a built-in screen. This window is not specific to a particular van type so you can use it on any van where the window fits. However, there is a difference between the passenger and driver side versions of this window – the opening part of the window is positioned to prevent wind noise. The modern design has a frame-less exterior to match with OEM Glass or today’s modern all glass style windows.
The glass is a 17% solar privacy tint safety glass for added privacy and UV protection.
Installation Overview
AMA windows require urethane adhesive - they do not use a "clamping ring" like CR Laurence windows.
Once installed, you cannot drive your van for abut 3-4 hours and the tape holding the window in place should be left for 24 hours while the adhesive cures.
If you are replacing an existing factory window that is glued in, you may want to take to a professional for removal and replacement. The best tool to use for removing an existing glued in window is a wire cutter such as the Equalizer Window Cut-Out Set but this is a difficult job. Once the existing window is removed, you will need to remove the urethane down as flat as possible and clean as much away as you can CRL Adhesive Cleaner .
What You'll Need
- Automotive urethane adhesive. You'll need about 2x tubes of adhesive for a large window or about 1x tubes for a small window.
- Primer for the sheet metal surrounding the window that the urethane adhesive/window will adhere to. These "daubers" work well for applying the primer.
- A high strength caulking gun with a minimum of 26:1 "thrust". Urethane caulking is very hard to get out of the tube. Don't try to use a "normal" caulking gun!
- A jig saw with a fine metal blade for cutting the opening
- Blue painters tape - both for protecting the van sheet metal/paint while cutting the opening and for securing the window in place after it has been placed into the urethane adhesive.
- We also recommend that you use gloves when working with the primer and adhesive.
Cutting The Opening
You will need to create a template to cut your window hole. The easiest way is to use the cardboard box it came with lay bunk window on it inside up. Measure out to create a template from the see-thru glass area of the window. When drawing the template onto van you'll either need a second person to hold the template in place or to use blue painters tape to secure it. A jig saw with a fine metal blade works well to cut the hole. It's typically easier to cut from the exterior of the van rather than from the interior. Be sure to protect the paint around the cut out with blue painters tape where the saw will be moving over the sheet metal. We also recommend trying to capture the metal shavings with plastic and/or a vacuum.
Be sure to "dry fit" the window to ensure that your opening is the right size/shape and that the window will fit into the opening in the place you want it. Make any adjustments to the opening before proceeding.
Preparing the Opening
Once the opening has been cut (or existing window removed) or window removed you'll want to file the edges of your cut and then primer those bare metal edges to prevent any corrosion.
Next you'll want to clean the outside metal/paint of the van around the area where the window will be installed with rubbing alcohol in order to ensure a good bond between the sheet metal/paint and the urethane adhesive/window. Also clean the window itself where it will interact with the adhesive with rubbing alcohol.
Applying Urethan Adhesive
Apply your urethane primer the outside of the body in the area that the window will be glued to. Consider using blue painters tape adjacent to the area you're applying the primer to prevent any primer from getting on areas of the van that the window will not cover. The primer looks like a thin, matte black paint when applied. Maintain an approximate 1/2" gap around the edges - do not go all the way to the edge of the metal that the window will cover. You do not need to apply primer to the window. Allow primer to dry for about 10 minutes.
Next, apply the urethane adhesive. Cut your urethane adhesive tube tip "straight across" (no v-notch). When applying you want a heavy bead (about the diameter of a "Tootsie Roll"). The adhesive should be applied to the back side of the window - not the van sheet metal. Apply the urethane adhesive close to the edge of the window frame. Be sure to evenly distribute to urethane adhesive and avoid any high or low points. When changing directions or starting/stopping the application, be sure to overlap your beads slightly to prevent any gaps. The most important part of a urethane window installation is consistency in the bead of urethane
Placing the Window
When placing the window you'll want to get it as close to desired location as possible one in one movement so that you can fine tune the placement slightly but not need to make significant adjustments which could either move the adhesive into areas that it shouldn't be or spread the adhesive too thin. It's ideal to have two people - one on the inside that can pull on frame and help position the window and the other outside ensuring the window does not fall out! One you've fine-tuned the position of the window, press on the window with an open palm all around the area/perimeter where the urethane adhesive was applied in order to press the glass into the adhesive for a strong bond. The goal with a van window installation is to have the glass about even with the outer body. You want to have an approximately 1/4" gap between the glass the van sheet metal. Avoid too small of a gap - while you may feel the aesthetic look is nicer during installation, you want to maintain the small gap for fluctuating temperatures/etc. so that the glass does not shatter in these conditions.
If any urethane adhesive oozes into the interior of the van, liberally spray the adhesive with glass cleaner and then use a plastic putty knife to smooth the urethane out like you might with spackling or caulking for a nicer appearance and adequate bond.
Finally, use blue painters tape to secure the window into place while the adhesive cures. You can drive your van after 3-4 hours and remove the tape after 24 hours. Do not wash the van for 72 hours.