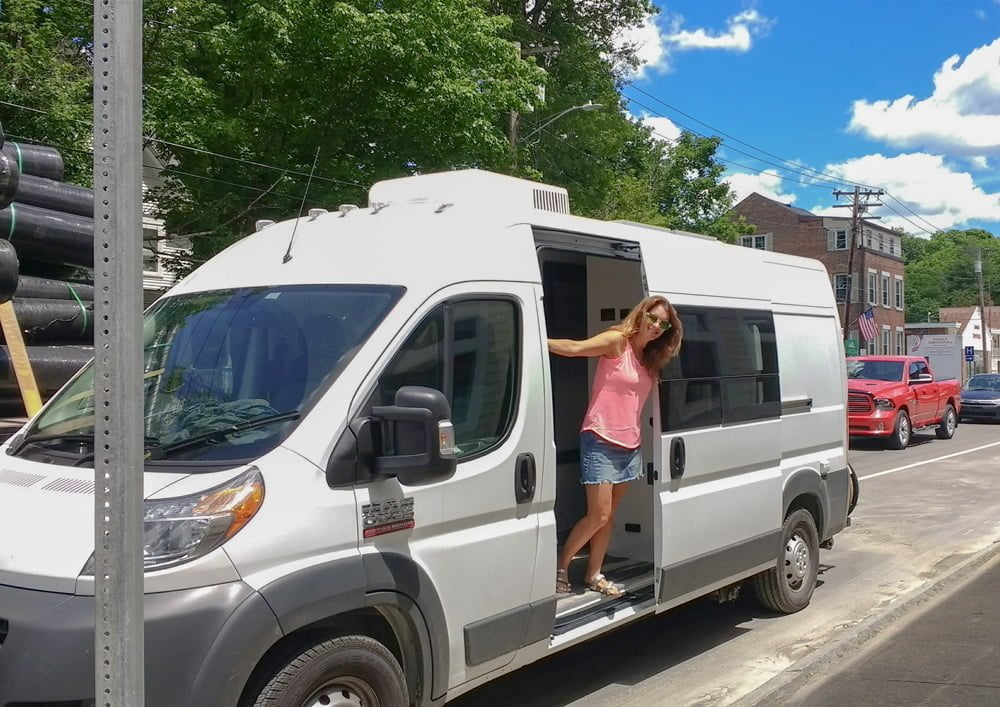
I’ve probably put more thought into insulating my camper vans than is considered sane or healthy. I can’t exactly say why I choose to obsess over this more than almost any other part of the van build, but that’s another conversation between myself and my therapist.
You might be asking: “Who are you and what makes your system so great?”
Well I don’t consider myself an insulation expert and I don’t know if that title exists in vanlife. But I’ll tell you a little about my experience. Since getting into vanlife in 2017, I’ve built or been involved in the build of over 15 camper vans and I’ve seen countless other vans being built. I’ve also done dozens of hours of research, reading and YouTube rabbit-holing. I’ve personally seen wool, thinsulate, reflectix, EPS foam board, spray foam, rock wool, fiberglass, denim and every other type of insulation and insulation method or system in the universe. All of that research and observation has led me to the creation of a system that I use in my vans and recommend to any of my friends, family and vanlifers who are building their van. In this blog post I’m going to keep it as simple as possible. I won’t be going deep into the science and analytics behind my system because that blog post is far too long and boring. If you have any questions or want a more technical discussion please feel free to reach out to me via e-mail or attend my Camper Van Insulation Analytics Ted Talk at MIT this Summer (just kidding).
What You’ll Need
Of course, the specific quantities will depend on your van.
Materials:
- ¾” EPS Foam Board
- ¾” Plywood
- ½” Plywood
- Marine Sealant
- Sound Deadener (80 Mil Preferred – Noico, Killmat, Etc.)
- Thinsulate SM600L (Automotive)
- 3M 90 Spray Adhesive
- Low-E Reflective Foam
- Rivnuts
- Wood Screws (1″ or dependent on your plywood choices)
- Foil AC or Low-E Tape
Tools:
- Heavy Duty Scissors
- Heavy Duty Caulking Gun
- Rivnut Installer Tool (Pneumatic/Hydraulic recommended)
- Drill
- Table Saw or Circular Saw
Phase One: Sound Deadener (Noico or Killmat)
I start by applying a sound deadener product like Killmat or Noico that volume to the sheet metal of your van which, in turn, reduces vibration that adds a lot of noise to an empty van. Some people choose to line their entire van with sound deadeners which in my opinion is an incredible waste of money and weight. In my experience, you only really need to cover 25% of each panel and I highly recommend you also cover the floor and wheel wells of the van completely as these especially are a high source of noise. Sound deadener is easy to use, just cut to size, peel the back, stick in on the sheetmetal and press or roll in on.
Phase Two: Insulation (Thinsulate SM600L)
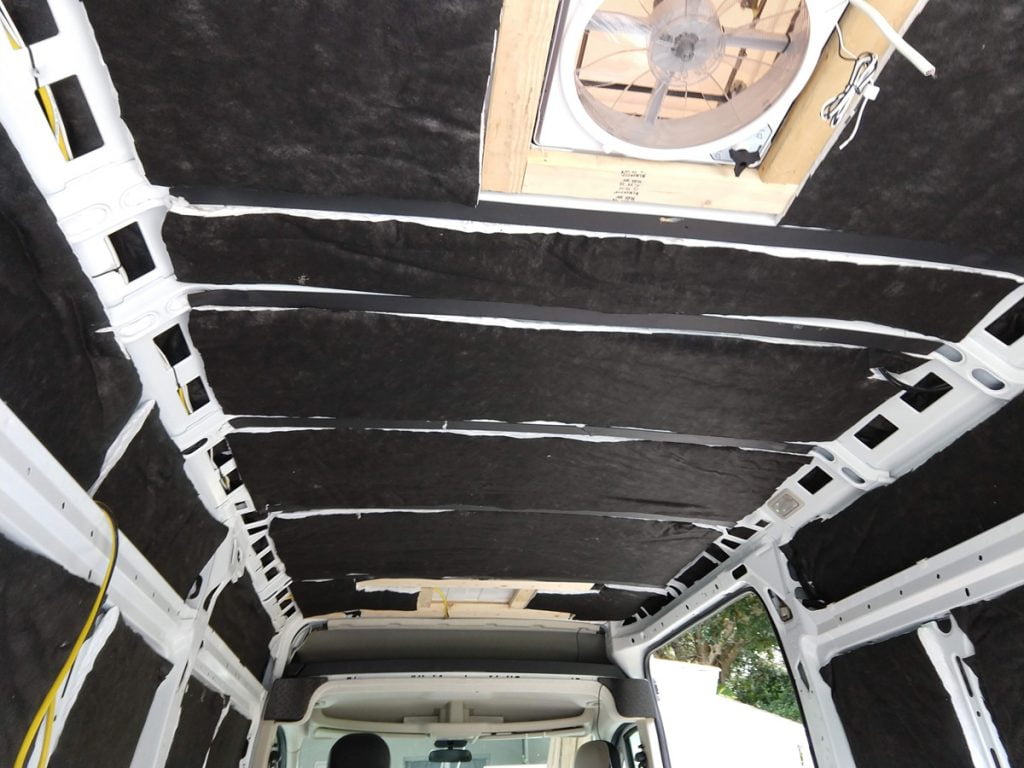
I have an entire blog post on why I like Thinsulate over wool. It’s a superior product to everything else on the market. I apply Thinsulate to the skin of the van over sound deadener with 3M 90 spray adhesive (spray the wall and the white side of the Thinsulate, wait 10 seconds, then stick the white side of the Thinsulate to the wall. I apply Thinsulate to every inch of the visible walls of the van. I also tuck Thinsulate into the door, ribs and crevices of the van (everywhere you can). I also take down the headliner over the cab and stuff Thinsulate and Low-E (see below) in there as well. The only place I don’t install Thinsulate is on the floor (more on that later). Once the Thinsulate is completed, I prewire the van and run all the branch wires to where the electrical system will be located.
Phase Three: Floor (EPS Foam Board, Silicone, Plywood)
Once you’ve installed the sound deadening and Thinsulate, this is a good time to think about installing your subfloor. The process of installing the subfloor is a little different from the rest of the van.
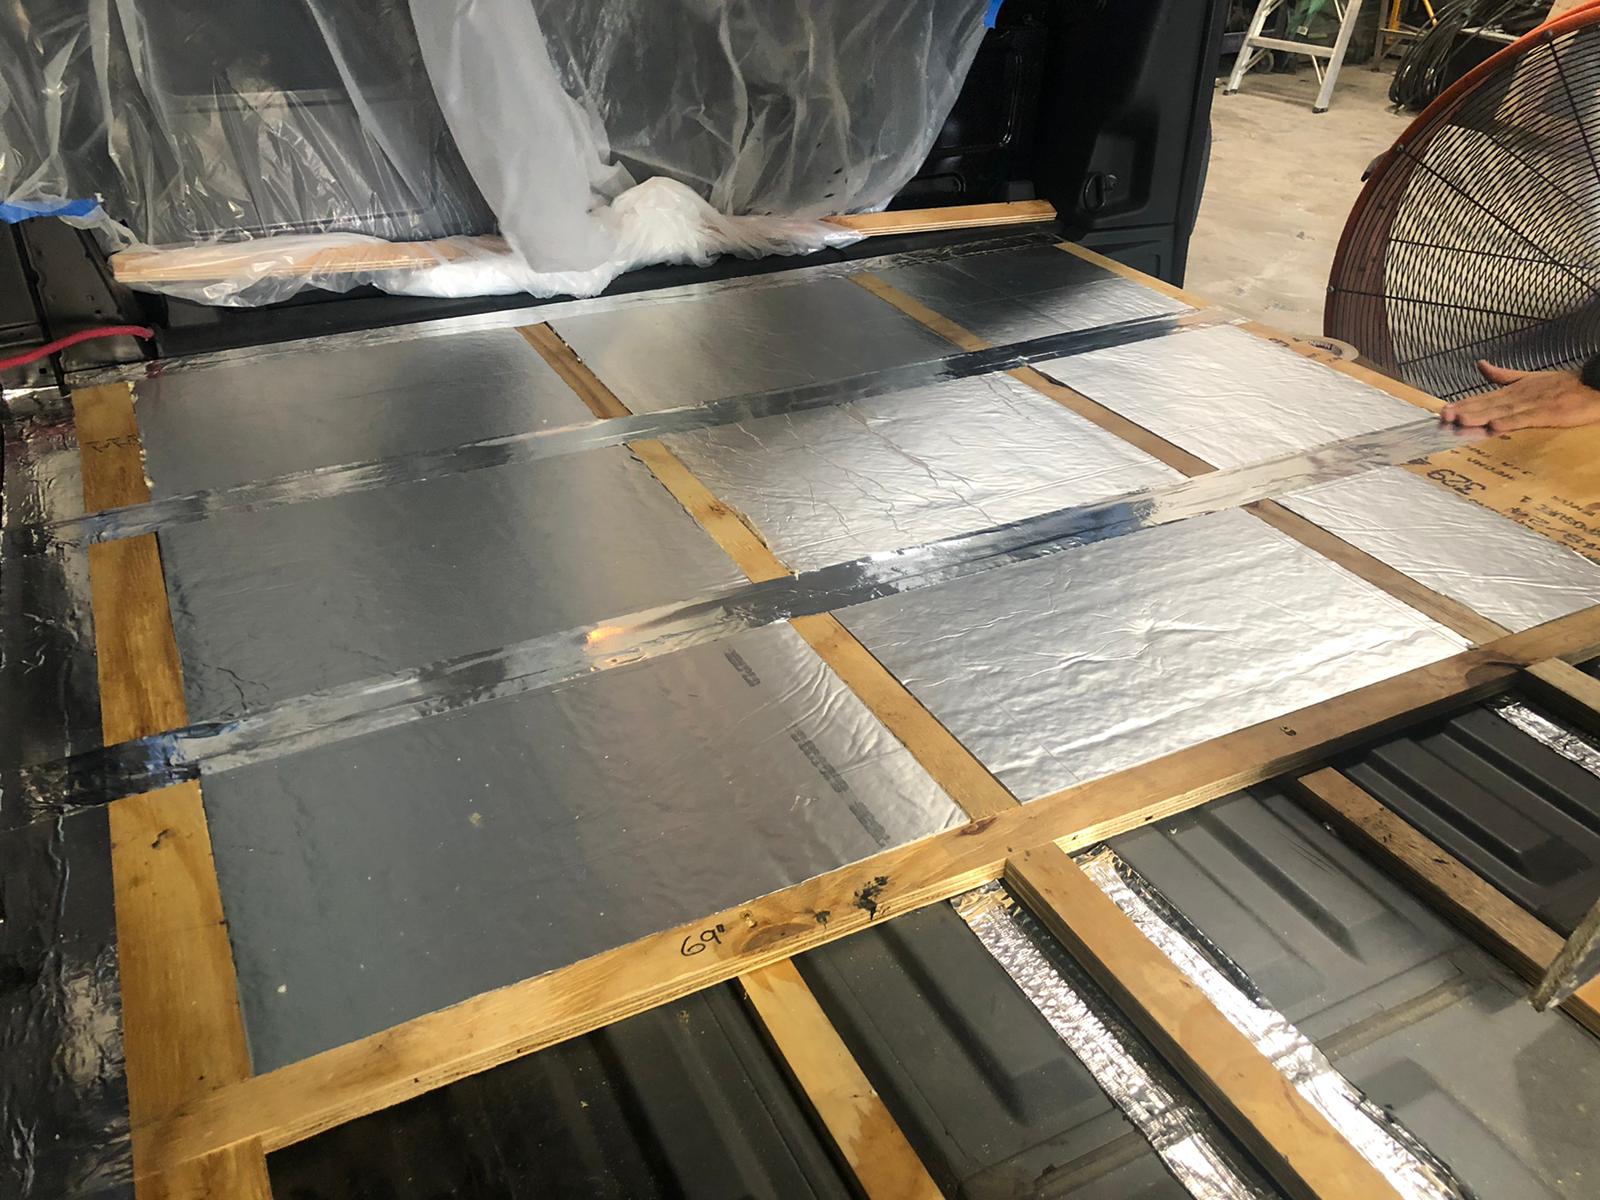
I cut three-quarter-inch plywood into three inch wide furring strips and attach them to the floor using marine sealant. I install the furring strips in a grid pattern with each strip about sixteen inches apart vertically and sixteen inches horizontally. Your floor should look like a giant tic-tac-toe board. I then cut three-quarter-inch thick EPS foam board (the kind with the foil on one side) into squares to fit the empty spaces between the furring strips. I place the EPS foam squares with the foil side facing up and tape them in using foil tape. At this point your floor should look like it’s covered in aluminum foil. The last step is to template out your floor onto three-quarter-inch plywood and screw your subfloor into your furring strips with wood screws.
Phase Four: Furring Strips (Plywood)
In this phase, I install half-inch furring strips (half-inch plywood cut into three-inch wide strips) on all the ribs of the van using Rivnuts (or Plusnuts) but I don’t fully tighten them yet since I will eventually take them down to re-install to hold the Low-E (Phase Four) in place.
Furring strips are important for a couple reasons. The first reason is that it gives you something to screw your walls and ceiling into. When you screw directly into the ribs in the van it creates metal on metal squeaking, it creates many more holes in your metal than is necessary (potential for rust) and most importantly it allows heat to be transferred (I will save you a boring lesson on the dynamics of heat transfer) from the metal of the van into the screws and then into your van. Imagine each screw head as a tiny heater giving off heat in your van, hundreds of those tiny heaters give off a lot of heat.
The second reason furring strips are important is that they give you the opportunity to create air gaps. Air gaps provide an additional thermal break between your insulation and your interior wall. I will also save you a boring lesson on thermal breaks, but just know that they’re good.
I also have a theory that having an air gap creates additional sound insulation, but this is just a theory.
The only drawbacks I see to using furring strips would be additional weight, additional cost and losing a half-inch of height and an inch of interior width in your van.
Phase Five: Radiant Barrier (Low-E)
Low-E is similar to Reflectix, but it is superior in quality. Low-E is a 7/32″ closed cell foam that is backed on both sides with pure aluminum foil (not “metallic looking” plastic like Reflectix). It acts as a reflective radiant barrier to deflect heat from away from the living space. It also acts as a very good vapor barrier and reduces condensation if installed properly.
Many automotive window shade manufacturers use Low-E inside their window shades to reduce the amount of radiant heat that is allowed into the vehicle.
The Low-E comes in six-foot wide rolls. This means that one piece can cover the entire ceiling, another single piece can cover the passenger wall, and another single piece can cover the driver side wall. I measure and cut a single piece for each wall and another for the ceiling. I also cut pieces for the doors and the headliner over the cab. If you have any Low-E left over and you’re crafty then you can make window shades.
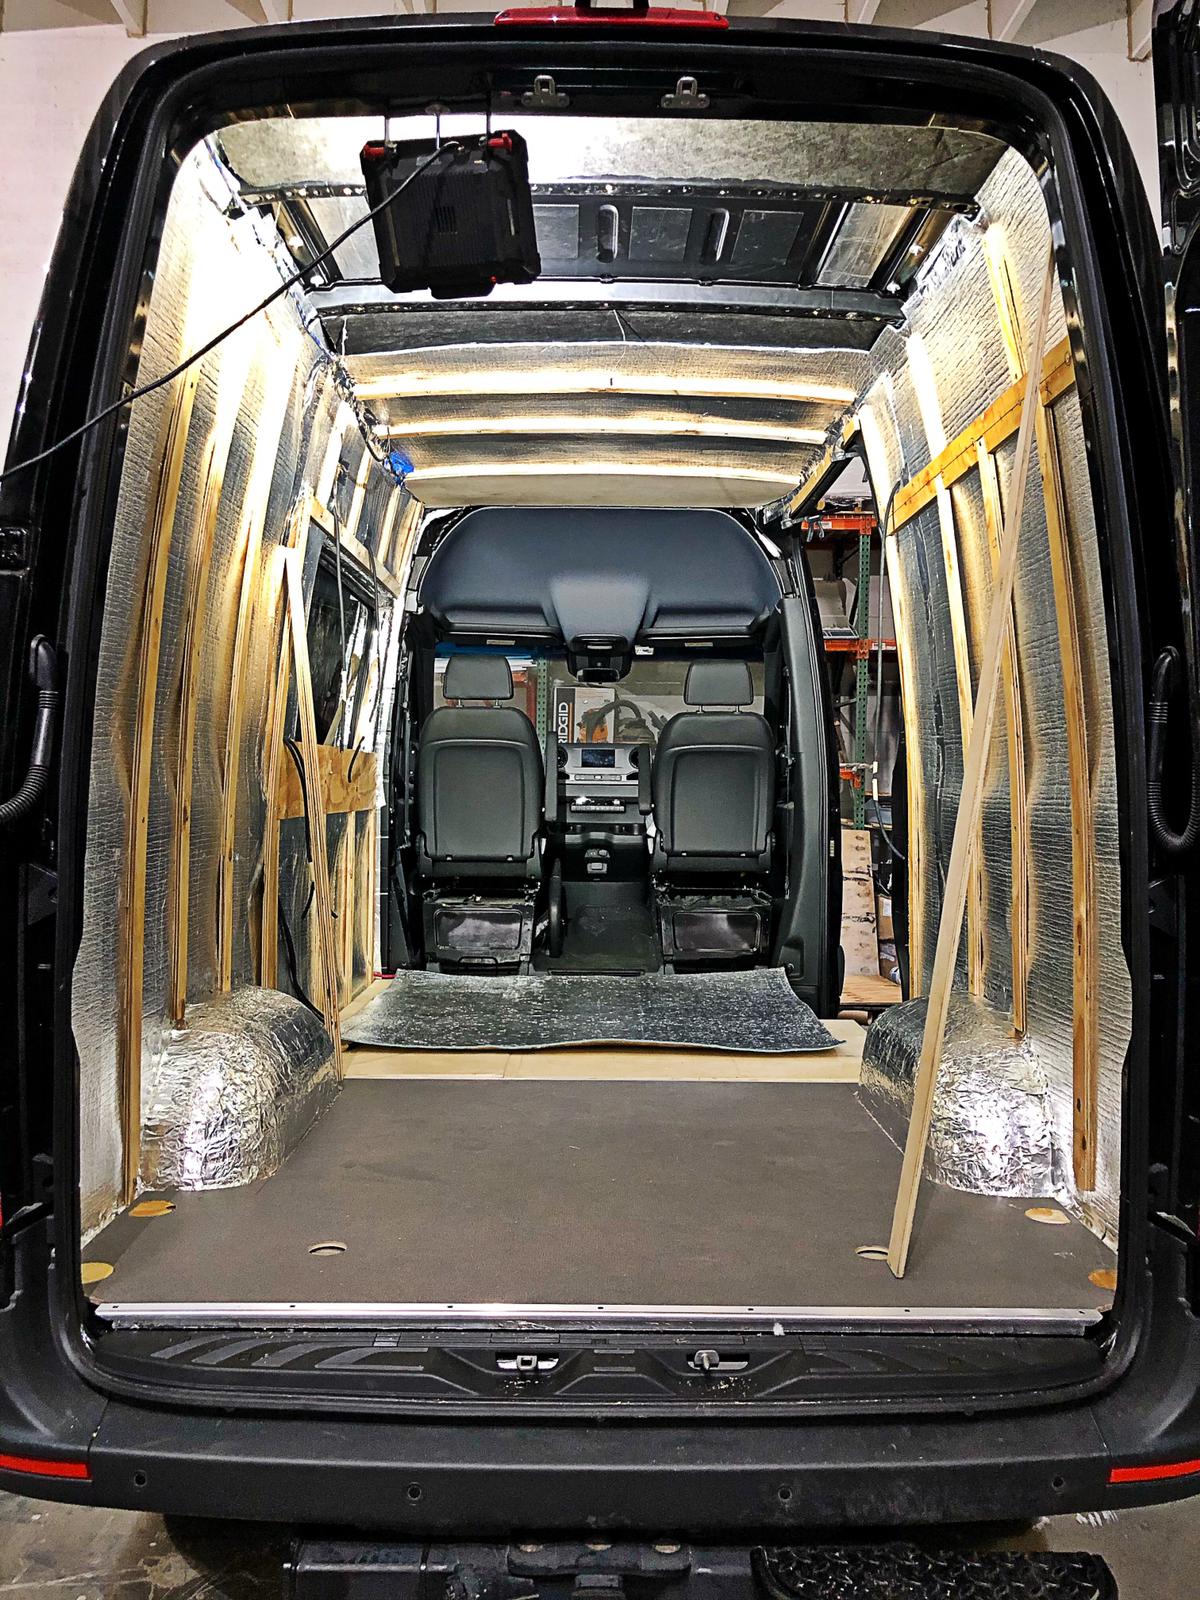
I take the Low-E piece I cut for the ceiling and put it up on the ceiling with magnets to hold it in place. I then mark out where all the rivnuts for the furring strips are. I reattach the firring strips to permanently hold the Low-E in place. I repeat the process with the driver’s and passenger side walls. I then tape the seams where the Low-E for the walls and ceiling meet with foil tape. (Don’t forget to make small holes to pull your wires through and make sure the holes are as tight as possible to the wire). You should have a seamless Low-E “shell” inside the van when this stage is completed. There will be an air gap between the Thinsulate and Low-E of about 1/2″+/- depending on the make/model of your van (this is your first air gap).
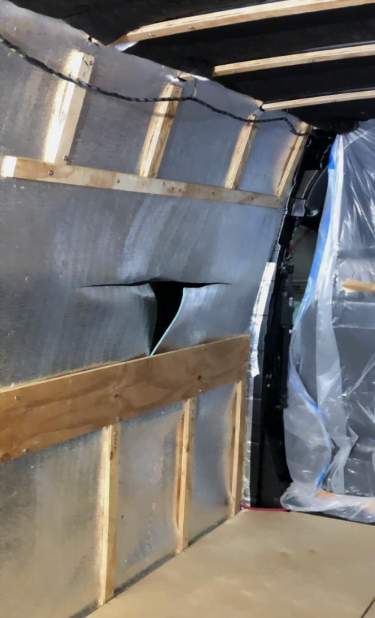
This photo shows the Low-E on the walls with furring strips locking it in place. There is an air gap between the Thinsulate and the back of the Low-E and there will be another air gap between the front of the Low-E and back of the plywood wall. The next step in the photo would be to take the furring strips off the ceiling and install the Low-E and put back the furring strips on top and then tape the seam where the wall and ceiling are joined. (The Low-E on the wall in the photo is cut because there is a window there).
Phase Six: Walls & Ceiling (Plywood)
Lastly, I install my plywood walls and ceiling by screwing them into the furring strips with wood screws. The space the furring strips creates between your Low-E and plywood walls is your second air gap. Theoretically, any heat that isn’t reflected back by the Low-E would have less of a chance of transferring to your walls.
Vanlife Outfitters has been supporting DIY camper van builders since 2016. We have a large collection of blog posts, videos, tips, resources, information and products to help you on your journey into vanlife. If you got any useful information from our site please let us know and if you’re in the market for products to build out a van please consider supporting our store!

