This post details using an marine-style water heater in a camper van conversion. These are small, tank-based water heaters which are connected to the engine coolant lines so that water is heated “automagically” while you’re driving and have an electric heating element as a “backup” for when you’re not driving.
Update! We sell these water heaters in our store – either stand alone or with a full installation kit for a ProMaster/Sprinter/Transit van that includes all the parts and pieces you need to connect the engine coolant plus a detailed installation guide and video. We sell the Spa version, the Slim versions of the Isotemp water heaters which, as you might guess, are a little slimmer (but longer) and the Square version which is, um, square-ish. They all work the same and the installation is pretty much the same – just different shapes and tank capacities.
But, First Some Background
In my first ProMaster build, I used this on-demand, propane fired water heater. It was installed underneath the refrigerator just behind the main galley area on the driver side of the van. It worked very well but had some drawbacks.
On-demand water heaters are triggered to turn “on” when there is adequate flow. So, when you turn on a hot water tap the unit should “sense” this flow of water, fire up, and begin heating water up to the desired temperature (there were three temperature settings on that unit). The problem with this is that you need to turn the water “on” quite a bit – or have a lot of “flow” – in order for it to trigger. In many cases, you just want a little bit of hot water in order to be conservative and maximize the water you have in your tank. For instance, if you’re washing dishes, you don’t need “full flow” just to rinse the dishes. In this type of situation you’d have to use more flow/more water than necessary with an on-demand water heater just to “trigger” the unit to fire up and therefore you basically “waste” water.
The other thing I didn’t like is that this “sensing” takes about two seconds. So, you turn on a tap at a high enough flow to trigger the unit and then it takes about two seconds of water flowing (strongly) before it turns on. While this seems minor, it does take a toll on water conservation efforts. Also, if you turn off the water – perhaps while showering to save water (between soaping and rinsing for example) – this startup delay results in cold water flowing in-between these on/off cycles which really isn’t ideal in that situation.
I think these on-demand style water heaters are better suited for larger RVs where you have much larger water tanks and hot water demands. It would also be very nice if you spent a lot of time in campgrounds/RV parks where you were connected to a “city water” connection and sewer connection. In that context, the lag in getting the hot water and need for higher flow wouldn’t be an issue and the strength of the on-demand unit – which is continuous/virtually unlimited hot water supply – would be a real benefit with long showers and so forth.
We do NOT recommend installing the Isotemp units outside of the vehicle and it would, unfortunately, void the warranty. They are designed to be inside a boat/RV and can be damaged under the van – even with the protection you’re proposing.
For winterizing the Isotemp, you really only need a shut-off valve on the cold water supply going into the unit. If you close that and drain the tank with the built-in pressure release/empty valve, that would be enough for winterizing. You could also turn off the coolant line loop valves (shown in green above) for winter but that isn’t necessary since the coolant can still flow through this additional loop – even when the water tank is empty inside the Isotemp.
The Upgrade: Isotemp SPA 20L Water Heater
After much research, I decided to install an Isotemp SPA 20L in my latest build. This is a 5.3 gallon capacity unit. It’s connected to the Promaster engine coolant lines with one hose supplying the heated coolant and another returning the it back to the engine. In addition, there is a 750 watt (115 volt) electric heating element that can heat the water if you’re not running the engine from an inverter or shore power. When driving, the water heater will heat the water in the tank to 190 degrees or more (up to 160 degrees when using the electric element) which is much hotter than average shower temperatures (110 to 120 degrees Fahrenheit). But, here’s the clever part! The water heater employs a “cold water mixing valve” that allows you to dial in the desired output temperature and works by mixing in unheated water from the cold water supply line. This system vastly increases the actual usable volume of hot water and reduces recovery time. Also, the combination of heating the water to such high temperatures and a very well insulated tank keeps the water in the tank plenty hot for hours after driving. In fact, in my initial testing, the water will stay hot enough to use for up to 12 hours in the warm Florida weather. All of this means that, as long as I’m driving reasonably often, I should only need the electric heating element to raise the “already somewhat warm or hot” water temp up to maximum temperature when stationary. Another benefit of the tank-based water heater (compared to an on-demand option) is that I effectively gain another 5.3 gallons of fresh water since, whenever the water pump is turned on, it keeps the water heater’s tank full as part of pressurizing the system. So, this extends my water capacity from the 33 gallons in the fresh water tank to over 38 gallons.
What You’ll Need
We sell water heaters with an optional installation kit with all the parts you need to connect to the engine coolant.
Note: RAM sells a “rear heater connection kit” that has some of these parts. But I understand it is expensive and you can just purchase equivalent parts.
These are additional the parts I used on a 2017 RAM Promaster, 159″ WB. If you’re installing into another type of vehicle/van, you’ll likely need other things!
- 3x 1/2″ PEX Female Thread Swivel Adapter. I used two of these for connecting the fresh water supply and hot water outlet (using adapter fitting below) to my PEX plumbing. The third one was used for the overflow outlet, but see the notes under Water Lines below for more info about the overflow connection.
- 1/2″ PEX Tubing. I used white-colored PEX wherever I could for my fresh water plumbing and color-coded the hot water supply lines with red electrical tape.
- Extra coolant to add to the system – Mopar part number 68163848AB.
Installation
To be honest, I was a bit daunted by the installation. I had never cut into coolant lines or done anything with the actual van/engine. But, like most times, the internet came through and I cobbled together the information I needed to tackle the job. I’m writing this post because I didn’t find anything comprehensive – mostly bits of information from various sources that I had to piece together.
The first step was to cut into the van’s heater lines near where they go into the “firewall”. If you open up the hood, you’ll see these hoses just to the left of the coolant reservoir. I’ve circled the area in in the photo below. You need to cut both of these. One hose will branch off to supply the water heater with coolant and the other will be the return line. This is a messy process so be prepared for a fair amount of coolant to come out of these hoses.

After cutting into the lines, I used the two Brass Barb Reducing Tees (3/4″ x 3/4″ x 5/8″). The two 3/4″ sides of this tee were used to repair the existing 3/4″ coolant line. Then I used a short piece of the 5/8″ heater hose to connect the 5/8″ ball valves onto the remaining 5/8″ side of this tee. These ball valves allow me to completely turn off the coolant flow to and from the water heater which effectively returns the coolant system to the standard, factory design.
Next, I ran the 5/8″ heater hose from the output of these ball valves down to the bottom of the engine compartment and all along the driver side of the van to the water heater’s location and eventually up into the van itself. The hose is clamped to the van in many places during this run so that it’s secure. Where the hoses enter the van, I drilled holes through the van floor and glued in 3/4″ PVC “union” fittings. This provides a durable and smooth surface so that the hose is not damaged. Keep in mind that these hoses get VERY hot so be sure to keep them away from anything flammable or that might be damaged by this heat when routing them from the engine compartment to the water heater location.
Once inside the van, I used the two Brass 5/8″ Barb to 1/2″ Female NPT FNPT Fittings and the 5/8″ Brass Elbow to connect the coolant lines to the inlet and outlet of the water heater and sealed the gaps with the Permatex 81160 High-Temp Red RTV Silicone. It’s recommended that you use Loctite 592, High Temperature Thread Sealant on the threaded connections.
I used the Gates PowerGrip hose clamps on all the 3/4″ and 5/8″ heater hose that connect to barb fittings.
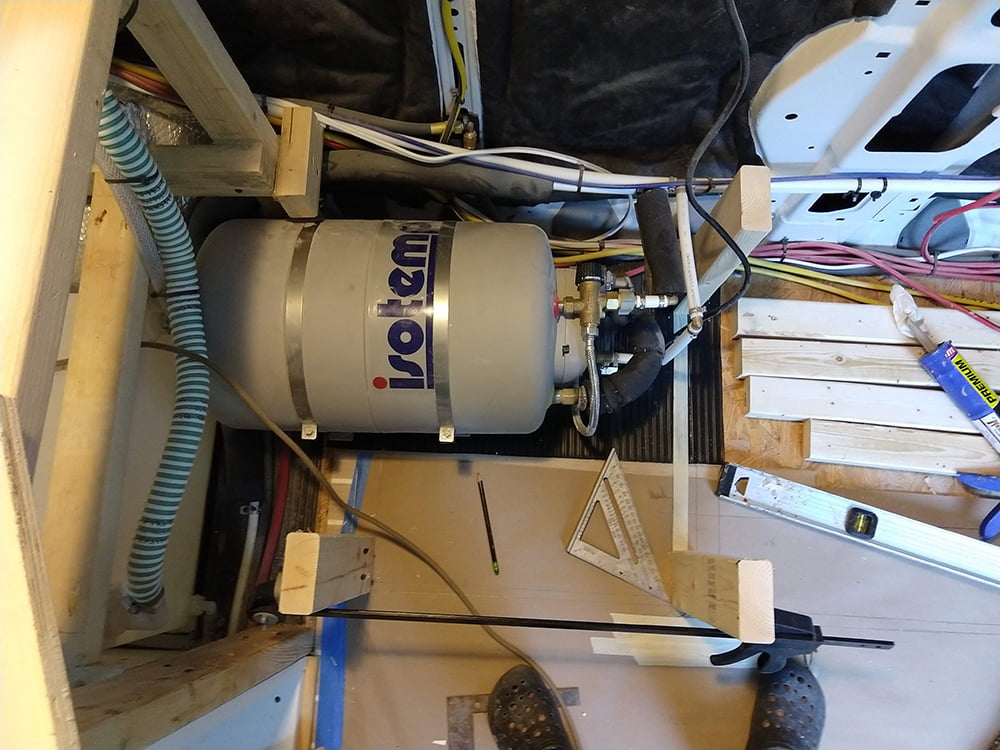
In my van, the water heater is located behind a drawer underneath the refrigerator which is just behind the galley area and just front of the bed loft. It’s installed directly onto the subfloor and comes with brackets to mount it to the floor. I used most (about 35′ of the 50′) of heater hose.
Coolant Connections Under the Hood of the Promaster

Coolant Hose Runs from Engine to Water Heater

System Illustration from Manual

Testing and Adding Coolant
After all the coolant lines were finished up I called the manufacturer to ask if I could run coolant through the unit before there was any water in the tank since, at this point, none of my water lines were in place. They told me that was fine so it was time to test! I made a note of how much coolant was in the reservoir and started up the engine knowing that, with the new 35′ of hose, I’d have to both add some coolant and somehow purge any air that got into the system. When the engine was running, but before the coolant had heated up significantly, I wrapped the area around what I’m calling the “air bleeding valve” with a rag (see this in the illustration above) and “opened” this valve by turning the cap on the top of this mechanism counter-clockwise. As expected, some air and coolant sort of gurgled out. I discovered that it took quite a while for the coolant to make it all the way through the newly added hoses and that it only did so when I started driving slowly. So, I would drive for about two minutes and then let the engine (and coolant) cool down and then check the coolant level in the reservoir and refill as necessary. I also used the “air bleeding valve” a few more times and, each time, less air came out until there was only coolant. I repeated this several times and eventually, I could “feel” the coolant running through the entire length of the newly installed hoses and at the fittings entering and existing the water heater. I ended up adding most of the gallon of coolant that I ordered.
Water Lines
It took several more weeks of the build process to get around to the actual water lines. I used white 1/2″ PEX for nearly all my fresh water plumbing and color-coded the hot water lines with red electrical tape. You can check out a detailed diagram of my plumbing system here. My goal was to limit the length of the hot water plumbing to the fixtures (sink and show) so that they were as short as possible thus minimizing the time (and water “waste”) it takes for hot water to arrive at the fixtures. The location of the water heater in my build is extremely close to the galley sink I can get hot water at the sink in about two seconds! The shower takes just a few more seconds.
The water connections are very straightforward. I used a 1/2″ PEX Female Thread Swivel Adapter on both the fresh water supply and hot water outlet along with standard PEX tubing and connectors to route the hot water lines to the galley faucet and shower mixing valve. As I wrote above in the parts list, all the threaded connections are 1/2″ NPT male except the hot water outlet which is BSP (British Standard Pipe) thread. Note that Isotherm recommends that you use a “single handle” type faucet for effective mixing of hot and cold water. I used this faucet in the galley.
Update 12/2021
There was some confusion about the BSP threading on the hot water outlet. I wrote to our rep at Indel/Webasto and here’s what I heard back to clear this up.
All of the fittings coming off of the water heater should be NPT thread which is used here in the U.S. The mixing valve (hot water outlet), is the one item that is not a standard NPT threaded part and for this reason at the manufacturing level we put on an adaptor.
Some product manuals have dated information or some are almost flatly translated from Italian into English or other languages. For that reason we lose the important information that in the U.S. we use NPT and in Europe and elsewhere they use BST. This should be reflected in the corresponding manuals. Everything shipped to the U.S. should have all U.S./NPT fittings coming off of the tank.
You’ll also need to connect the built-in pressure relief valve on the water heater to a drain on the exterior of the van. In my installation, I simply used another 1/2″ PEX Female Thread Swivel Adapter and a short length of PEX hose that goes through the van floor. This allows any release of water from the valve (to relive pressure) to run onto the ground. This valve can also be opened manually to drain the tank for winterizing or repairs.
Update 4/2025
Some customers have trouble getting a 1/2″ NPT female fitting to seat well on the overflow aka pressure relief valve. According to IsoTemp, this valve is actually 1/2″ tapered BSP, and it is quite difficult to find a fitting that seats well on the shallow overflow valve threads. IsoTemp suggests a simple workaround by clamping braided tubing to the overflow valve instead.
Once all the water lines are installed you can let the unit heat up water and adjust the “mixing valve” so that the output temperature is at your preferred temperature.
Electrical Connections
The electric heating element draws around 750 watts at 115 volts AC. So, you must have either an inverter or shore power to use the electric heating option. The Isotemp unit comes with a standard AC power plug. I wired this switch into the circuit that the water heater is plugged into so that I can leave it plugged in and control it with the switch which has a red LED indicator light when in the “on” position. I wanted this indicator light because I don’t want to leave the unit on unless it’s necessary since it draws a significant amount of power. I positioned this switch just behind the driver’s seat (near the galley) so I can turn it off when driving. I knew that I would forget to turn it off sometimes and want to do so when underway!
How It Works
I am super happy with this water heater! Since I tend to move a lot/drive a lot, it’s awesome to have essentially “free” hot water. I find that the water in the tank stays plenty warm for long periods of time including overnight most of the time. So, I rarely have to use the electric heating element which is great because it’s a pretty significant 750 watt draw on the inverter when turned on.
One thing to be aware of is that, after you heat the water with the engine coolant, if you turn on the electric heating it can sometimes “trip” a built in “high limit thermostat” that is installed to protect the water heater when in electric mode. This can be “reset” with a tiny button near the mixing valve but, by default, it’s located under a plastic cover. So, I drilled a hole in the plastic cover so that if this happens, I can use a pencil or screw driver to reset the thermostat without having to take that cover off.


