As anyone who’s build a DIY camper van can attest, getting the best parts for your build is extremely time consuming. For me it was a constant challenge to find products that worked in my design, functioned well, looked good and performed at a high level.
Often, I didn’t even know the name for the thing I was trying to find! What is that thing called that allows a cable to go through a hole and create a waterproof seal? A “gland”? Oy! Let’s just say that wasn’t the first thing that came to my mind. Anyway, I hope this saves you some time and gives you more confidence in your build out!
Check Out Our Store
It takes thousands of parts to build a tiny home on wheels. We actually have a store with some of the best products we’ve found that are generally either hard to get elsewhere (not on Amazon, etc.) or we can offer a better price. We also have a growing selection of exclusive products that we fabricate ourselves to make building a DIY camper van a little bit easier. Wherever possible, we link to the items in our store but we’re realistic and know that much of what you’re going to need for your camper van is going to come from Amazon. However, we certainly appreciate your support of our store. From what we can tell, Jeff Bezos is probably doing alright!
By the way, I’ve also compiled a list of essentials things to have in the van when travelling.
I didn’t list things that are commonly found at hardware stores like lumber, basic plumbing parts, fasteners, etc. Instead, I focused on items that were more van camper specific that required research to decide between the options available.
I wrote another post on why I chose the Promaster and I’ve also wrote a post about my electrical system including a wiring diagram and many other posts!
| Electrical System | |
| Please see this post that details a complete example electrical system including a wiring diagram and all the materials. | |
| Propane System | |
| Propane system update: in my first two vans (Miles Van Camper v1 and v2) I had more propane powered appliances. The first van build had a propane on demand water heater, a Propex heater and the cooktop. The second build had the Propex heater and the cooktop. In that build I used an Isotemp Spa 20L for water heating and wrote a post about that. For the latest build, I decided to minimize the use of propane and I switched from a Propex furnace to a Webasto gasoline powered heater with the same Isotemp water heater. That left me with only the cooktop that ran on propane. I considered going “all electric” and using an induction cooktop but decided to stick with the combination cooktop/sink from Dometic that I had used in my previous van for two reasons. I much prefer cooking with propane and the space efficiency of the combo unit is so much better than having both a sink and cooktop. So, instead of an under mounted propane tank, I’m using the tiny 1 pound cycliders of propane for camping that you get any just about anywhere. These are very inexpensive, readily available and I can keep a few extras around. The Dometic cooktop is very effecient and I expect to get about 4-5 hours of cooking time with these small cylinders. There are refillable tanks of this type that I might experiment with as well.
I wrote a blog post about using an under mounted propane tank with a remote fill if you’re interested in that option and I’ve included all the parts and materials in that post. |
|
opens in a new window |
1 Pound to 20 Pound Propane Cylinder Adapter This thing screws onto the 1 lb cylinders I’m using and adapts it to use with a standard regulator (below). |
opens in a new window |
6 Feet Low Pressure Propane Hose with Regulator and 3/8 Female Flare Connection This hose connects the propane cylinder (with adapter above) to the cooktop. |
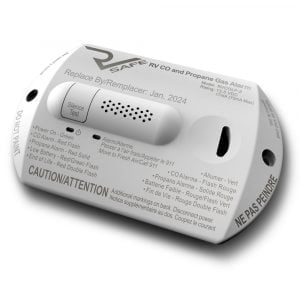 |
Dual Carbon Monoxide and LP Gas Detector/Alarm Great to have this two-in-one unit. It’s installed just front of the galley above the “step/heater cover”. Propane gas “sinks” so you want to install any LP gas detector low to the ground. |
| Cooling and Heating | |
opens in a new window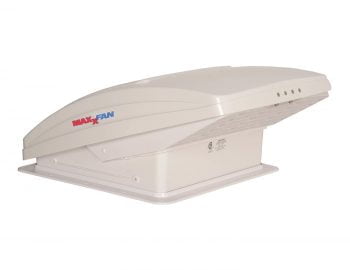 |
Maxxair 0007000K MaxxFan with Remote Installed over the bed/loft. It has 10 speeds and can either “pull” air into the van or “push” it out. I love this fan! |
opens in a new window |
Coleman Mach 8 “Cub” Air Conditioner When you spend time in Florida and the south, you gotta have AC. My inverter is capable of “starting” and running this unit but I would only do that for very short periods of time. It’s really there for when I have shore power. This “cub” version is their smallest and lowest profile unit at 9200 BTUs which is about 11.7 amps AC or 1270 watts at 120 volts AC. If you have a smaller inverter, I’ve heard that you can buy a device like this that allows it to “start” with lower electrical draw. Motor loads like this AC need much more power to “start” than when they’re running. I wrote a post about the air conditioner here.Looking to run your AC unit off your batteries? There are several 12VDC options that are much more energy efficient that I mention in my AC blog post and that we sell in our store, check ’em out. |
opens in a new window |
This “ceiling assembly” is the part that is installed inside and is sold separately for some reason. |
opens in a new window |
Webasto Gasoline Heater Very compact fully vented furnace that runs off gasoline! Promaster vans actually come from the factory with an “auxillary” fuel tap that makes it easy to run a gasoline hose to this unit’s pump. Here’s my extensive post on installing and buying a Webasto heater. |
| Plumbing click here to read a post about my plumbing system |
|
opens in a new window opens in a new window opens in a new window |
Water Fill with City Water and Key Lock I see a lot of people putting their water tank fill inlets inside the van near the side or back doors. When I fill up it tends to be messy with overflow so I prefer this to be on the side of the van. This product has a lock which is nice and a “cut out” for a hose so if you are connected to “city water” you can close the panel while the hose is connected. That said I almost never use a city water connection and find it easier to just fill up the water tank. This also comes with a “check-valve” to prevent the city water connection from back flowing. This is installed next to the shore power inlet on the driver’s side of the van. |
opens in a new window |
33 Gallon Fresh Water Tank It’s great to have a lot of fresh water on board. This is installed under the bed on the driver’s side near the wheel well. The entire fresh water system (tanks, lines, etc.) is inside the van for all season camping. I recommend that you go big with water storage – especially if you have a shower. Generally speaking you can generate your own electricity (solar, alternator charging) to stay off grid but it’s not always easy to find water sources. |
opens in a new window |
1-1/4″ Fresh Water Fill Hose Just a 5′ section of this hose. This is WAY better than the stuff you find at the hardware store for this purpose. It’s flexible yet strong. If you look at RVs and boats, this is the standard hose used but I could not find it anywhere and didn’t know what to search for! |
opens in a new window |
SeeLevel Tank Monitor This is a great system for monitoring the levels of your fresh and grey water tanks. It uses sensors that “see” (hence the name) the level of liquid in the tanks without needing the “old-fashioned” probes that many older vans/campers used. Those tend to get dirty and stop working correctly. The panel comes in a variety of configurations depending on how many tanks you’re monitoring (fresh, grey, black) and whether or not you have a propane tank.If you want to monitor your tanks with the Victron Energy Cerbo GX, check out this blog post and our tank monitoring bundle. |
opens in a new window |
Small RV-Style Sink Trap I used this trap on my galley/kitchen sink with a 3/4″ flexible drain line to the grey water tank. |
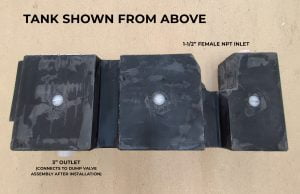 |
26 Gallon Ram Promaster Greywater Tank We’ve created a 26 gallon grey water tank that fits perfectly under the passenger side of a Ram Promaster. It hides so well that it can barely be seen from the street. This tank is perfect for someone who wants a large capacity grey water tank, but doesn’t want to sacrifice ground clearance or stealth. |
opens in a new window |
Valterra T50 3″ Hub x 3″ Bay Grey Water Drain Valve Standard 3″ grey water tank drain that uses standard drain/sewer hose. I use this sewer hose and it works great. |
opens in a new window |
Horseshoe Vent Good example of something you would never know the name of – I sure didn’t. I used this vent on the outside wall of the van to vent my grey water tank there instead of on the roof. There is a 1-1/2″ PVC elbow glued (with marine sealant) into an adequately size hole in the van sheet metal that my flexible 1-1/2″ vent hose connects up to. |
opens in a new window |
Valterra 46″ Sewer Hose Carrier I have this installed on the underneath of my bike/cargo carrier and it stores the grey water tank draining hose. Very handy way to store this outside the van. |
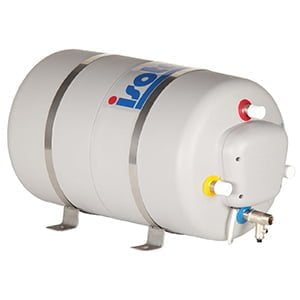 |
Isotemp SPA 20L Marine Water Heater This is a clever system designed for boats. The water is heated “automagically” as you drive by having the van’s coolant lines run through a heat exchanger. If you are not driving, there is a 750 watt AC heating element that runs off my inverter or shore power. I wired through this switch with an LED indicator light by the galley so I “remember” that the AC heating element is on and so I can reach around and turn it off when driving. The 5.3 gallon tank is super well insulated so it maintains the temperature of the water for long periods of time after driving. Another great feature is that it heats the water up to 190 degrees (f) – way hotter than you’d want to use and there is a “mixing valve” out the outlet that mixes cold water with the hot from the tank to a specified temperature. This significantly extends the capacity of the 5.3 gallons. Some have reported getting nearly twice that in hot water. It also aids in recovery time if you need to heat the tank with the electric element. Finally, this tank effectively adds about 5 gallons to my total fresh water capacity. So, with the 33 gallon tank and this additional 5 gallons of stored hot water, I have about 38 gallons of available water on board.I wrote a blog post about this water heater and the installation process here.Note: we sell this water heater! You can order it either stand alone or with a full installation kit for a Promaster van. |
opens in a new window |
SHURflow Revolution Water Pump This is my fresh water pump. The panel SeeLevel II panel above has a switch that is connected to this relay which actually controls power to the pump itself. |
 |
SHURflow Strainer This strainer/filter goes on the inlet side of the pump to filter/strain out particles. The bottom portion of it screws off so that it can be cleaned out when necessary. |
opens in a new window |
SHURflo 182-200 Pre-Pressurized Accumulator Tank SHURflo says the pump I use doesn’t need an “accumulator” which maybe true but I find it really smooths out the flow. It’s pretty inexpensive and simple to install so I would recommend using one. |
opens in a new window |
3M Filtrete Maximum Under Sink Water Filter This water filter is installed under the bed so it doesn’t take up space in the under-sink cabinet. There are some valves to control the water supply to it and from it. I have it connected to this faucet that is installed next to the sink. Very convenient to have filtered water right out of a tap. |
opens in a new window |
Fontanna Compact Exterior Shower This outdoor shower is installed in the cabinetry accessed from the back doors. |
opens in a new window |
Grey Water Holding Tank Heating Pad I installed one of these heating pads on the grey water tank that is located underneath the van. I also used a few of these smaller heating pads on the drain lines underneath the van that are wired together with the grey tank heating pad on a switch so that I can turn these on when camping in very cold weather to keep these drain lines and the tank from freezing. The tank heater is installed on the “outlet” side. |
| Notes: Of course, in addition to these “major” components there are hundreds of connection parts and hoses. During this build I lived a few blocks from an Ace Hardware store which was so lucky. I was there at least once a day. Especially in plumbing you need one of everything! In this build there is 1/2″, 3/8″, 3/4″, 1″, 1-1/4″ and 1-1/2″ lines and a mix of Pex, copper, braided hose and PVC. So you need connectors and tools and glues and everything for each of them. |
|
| Shower/Bathroom | |
opens in a new window |
KES L6701 Single Handle Shower Valve Nice and compact mixing valve for the shower. It was tough to find something small enough to fit into my “shallow” wall cavities – the standard household units are too big. I was able to buy the mixing valve by itself but not it’s sold with a shower head that I wouldn’t recommend using. Rather, I would recommend the low flow shower head below. |
opens in a new window |
Niagra Massage Low Flow Shower Head Super low flow 1.5 GPM flow conserves water but “feels” like a standard shower head. A standard “low flow” shower head is 2.5 gallons per minute so this is considerably more efficient. |
opens in a new window |
1-1/2″ Hepvo Trap This clever “trap” performs the function of a standard “p-trap” to prevent odors from escaping from the grey holding tank but in much less space. It also prevents water from “back flowing” into the shower when driving. These can be installed vertically or horizontally. In my case it’s installed horizontally just below the shower pan. |
opens in a new window |
Lippert Components White 24″ x 32″ Rectangular Left Handed Drain Shower Pan This tiny shower pan is the perfect size in my opinion. I coupled this with shower walls I built with plywood that is covered with a thin plastic sheeting to make a waterproof wet bath. Note, they also make a 24″ x 36″ shower pan that is just a bit bigger if you feel like you need that extra space. |
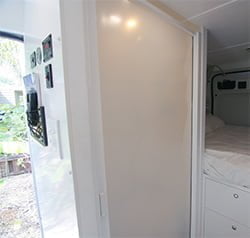 |
Nautilus 36″ Wide x 62″ Tall Shower Door I love how this basically disappears into its “cassette” when not in use and takes up very little space compared to a standard “door” that is in the way when open and often rattles when driving. I used the 62″ tall by 36″ wide version with the square housing and “opaque plain” screen. |
opens in a new window |
3-Chamber Soap/Shampoo Dispenser A nice way to organize your soaps and shampoos and keep them secure when driving. |
opens in a new window |
Bar Soap Holder Nicely designed and does the job. |
opens in a new window |
Oceanair Marine Dryroll Protective Toilet Roll Dispenser It’s important to keep your toilet paper dry in a wet bath! This thing is awesome and very clever – it sort of feeds the toilet paper out when you lift the lid – giving you something to grab onto and then retracts it (rolls it up) when you close the lid. |
opens in a new window |
Thetford Curve Cassette Toilet I’m really happy with this toilet system and that I don’t have to deal with draining a black tank. I used this mounting plate to secure it to the shower floor which keeps it in place while driving but also allows it to come out of the space if you want to remove it when showering. I leave it in the bathroom when showering. There is just enough space in front of the toilet to stand when showering or you can use the toilet of as a seat while showering. I also recommend this toilet paper which is both substantial enough to “get the job done” but also dissolves well! |
| Galley | |
opens in a new window |
Dometic SMEV MO0911 Combination 2-Burner Propane Cooktop With Sink This is a great product that I really like both in terms of design and function. The only negative is that it doesn’t have electronic ignition. The other SMEV products generally do. However, it’s simple to light with a lighter. I use this space-saving RV drain/trap with the sink/strainer. |
opens in a new window |
Water Faucet for Sink Simple and compact size works well for my space. I like the way it pulls out and can switch between standard flow and a spray option. |
opens in a new window |
Water Dispenser for Filtered Water Not much to say! It works and kind of matches the design of the sink faucet. |
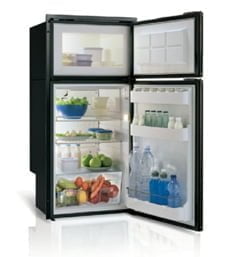 |
Vitrifrigo DP150 5.3 Cubic Feet Refrigerator/Freezer I wanted a much bigger refrigerator/freezer than you normally find in van campers, one that had a separate freezer compartment and that allowed for enough space “above” it for the microwave. This unit meet all those criteria and it’s very well built. The frig is 5.3 cubic feet and the freezer is 1 cubic foot. Like most of these RV/marine refrigerators, it uses the super energy efficient Danfoss compressor. We sell this refrigerator for a very competitive price. The frig comes with black door panels but we also sell it with upgraded white or aluminum door panels. I used aluminum on my latest build. |
opens in a new window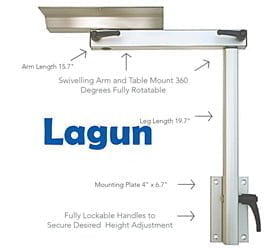 |
Lagun Table Mount This is an extremely versatile table mount that moves in just about every direction and can lock into place while driving. There is a reason just about every van builder uses this mount! |
opens in a new window |
Stainless-Steel Microwave 1.0 cu ft. with Trim Package I didn’t have a microwave in the first build but it will be an awesome feature. It’s installed just above the refrigerator. |
opens in a new window |
3″ x 6″ “Peel and Stick” Aluminum Tiles I used these brushed aluminum tiles as the backsplash in the galley area. I think they look great and compliment some of the other aluminum and stainless steel components and they were very easy to use and install. I was able to cut them cleanly with a chop saw. |
opens in a new window |
DeLonghi Dedica Espresso Machine Waking up with a a good espresso drink anywhere in the world where you’re camping is such a luxury! This machine makes great espresso while having a super small profile. |
| Notes: The galley cabinets, and both set of drawers under the bed are IKEA kitchen cabinets that have been modified to work in a van. Many people have raised concerns about using cabinets like this but they have held up amazingly well and are very strong in this environment. THey also look great and have the advantage of being replaced or repaired at any IKEA store. As an example, I forgot to latch a drawer before driving away from a camp site and after breaking hard it flew out and broke against the floor. All I had to do was visit the next IKEA along the journey and replace that single drawer which took about 30 minutes. Had that been a custom-built drawer, I would have had to find a place and tools to completely rebuild it. I will be writing an entire post on using IKEA kitchen cabinets in a camper van build! In addition to their cabinets, I used a few “cover panels” for walls so that they would match the finish. The results look really great to me. |
|
| Connectivity / Internet | |
opens in a new window |
Weboost Signal Booster This booster includes an antenna that you put on the roof of your van which connect to a “cradle” inside. When you put your phone or other cellular data device (mifi, Jetpack, etc.) into the cradle it boosts/strengthens the signal. Generally speaking this will get you “one bar” of service in many places where you normally don’t have any service at all or an additional “bar” of service (and therefore faster data speeds) in other areas. Defiantly recommend something like this if you’re working on the road! |
| Miscellaneous | |
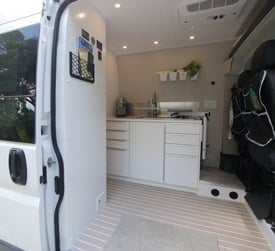 |
Lonseal “Antique and Ivory” Vinyl Flooring I don’t think wood or engineered wood flooring makes sense in a van with all the moisture, dirt, mud and traffic it encounters. In my first build I used vinyl tiles which were really nice and I loved the way they looked, but the variances in temperature caused very slight gaps in between the tiles that was not ideal. For my second build I choose Lonseal sheet vinyl. This is designed for marine applications so it’s very well made and durable. I like how the “ivory” lines in the flooring accentuate the clean lines of the rest of the design. |
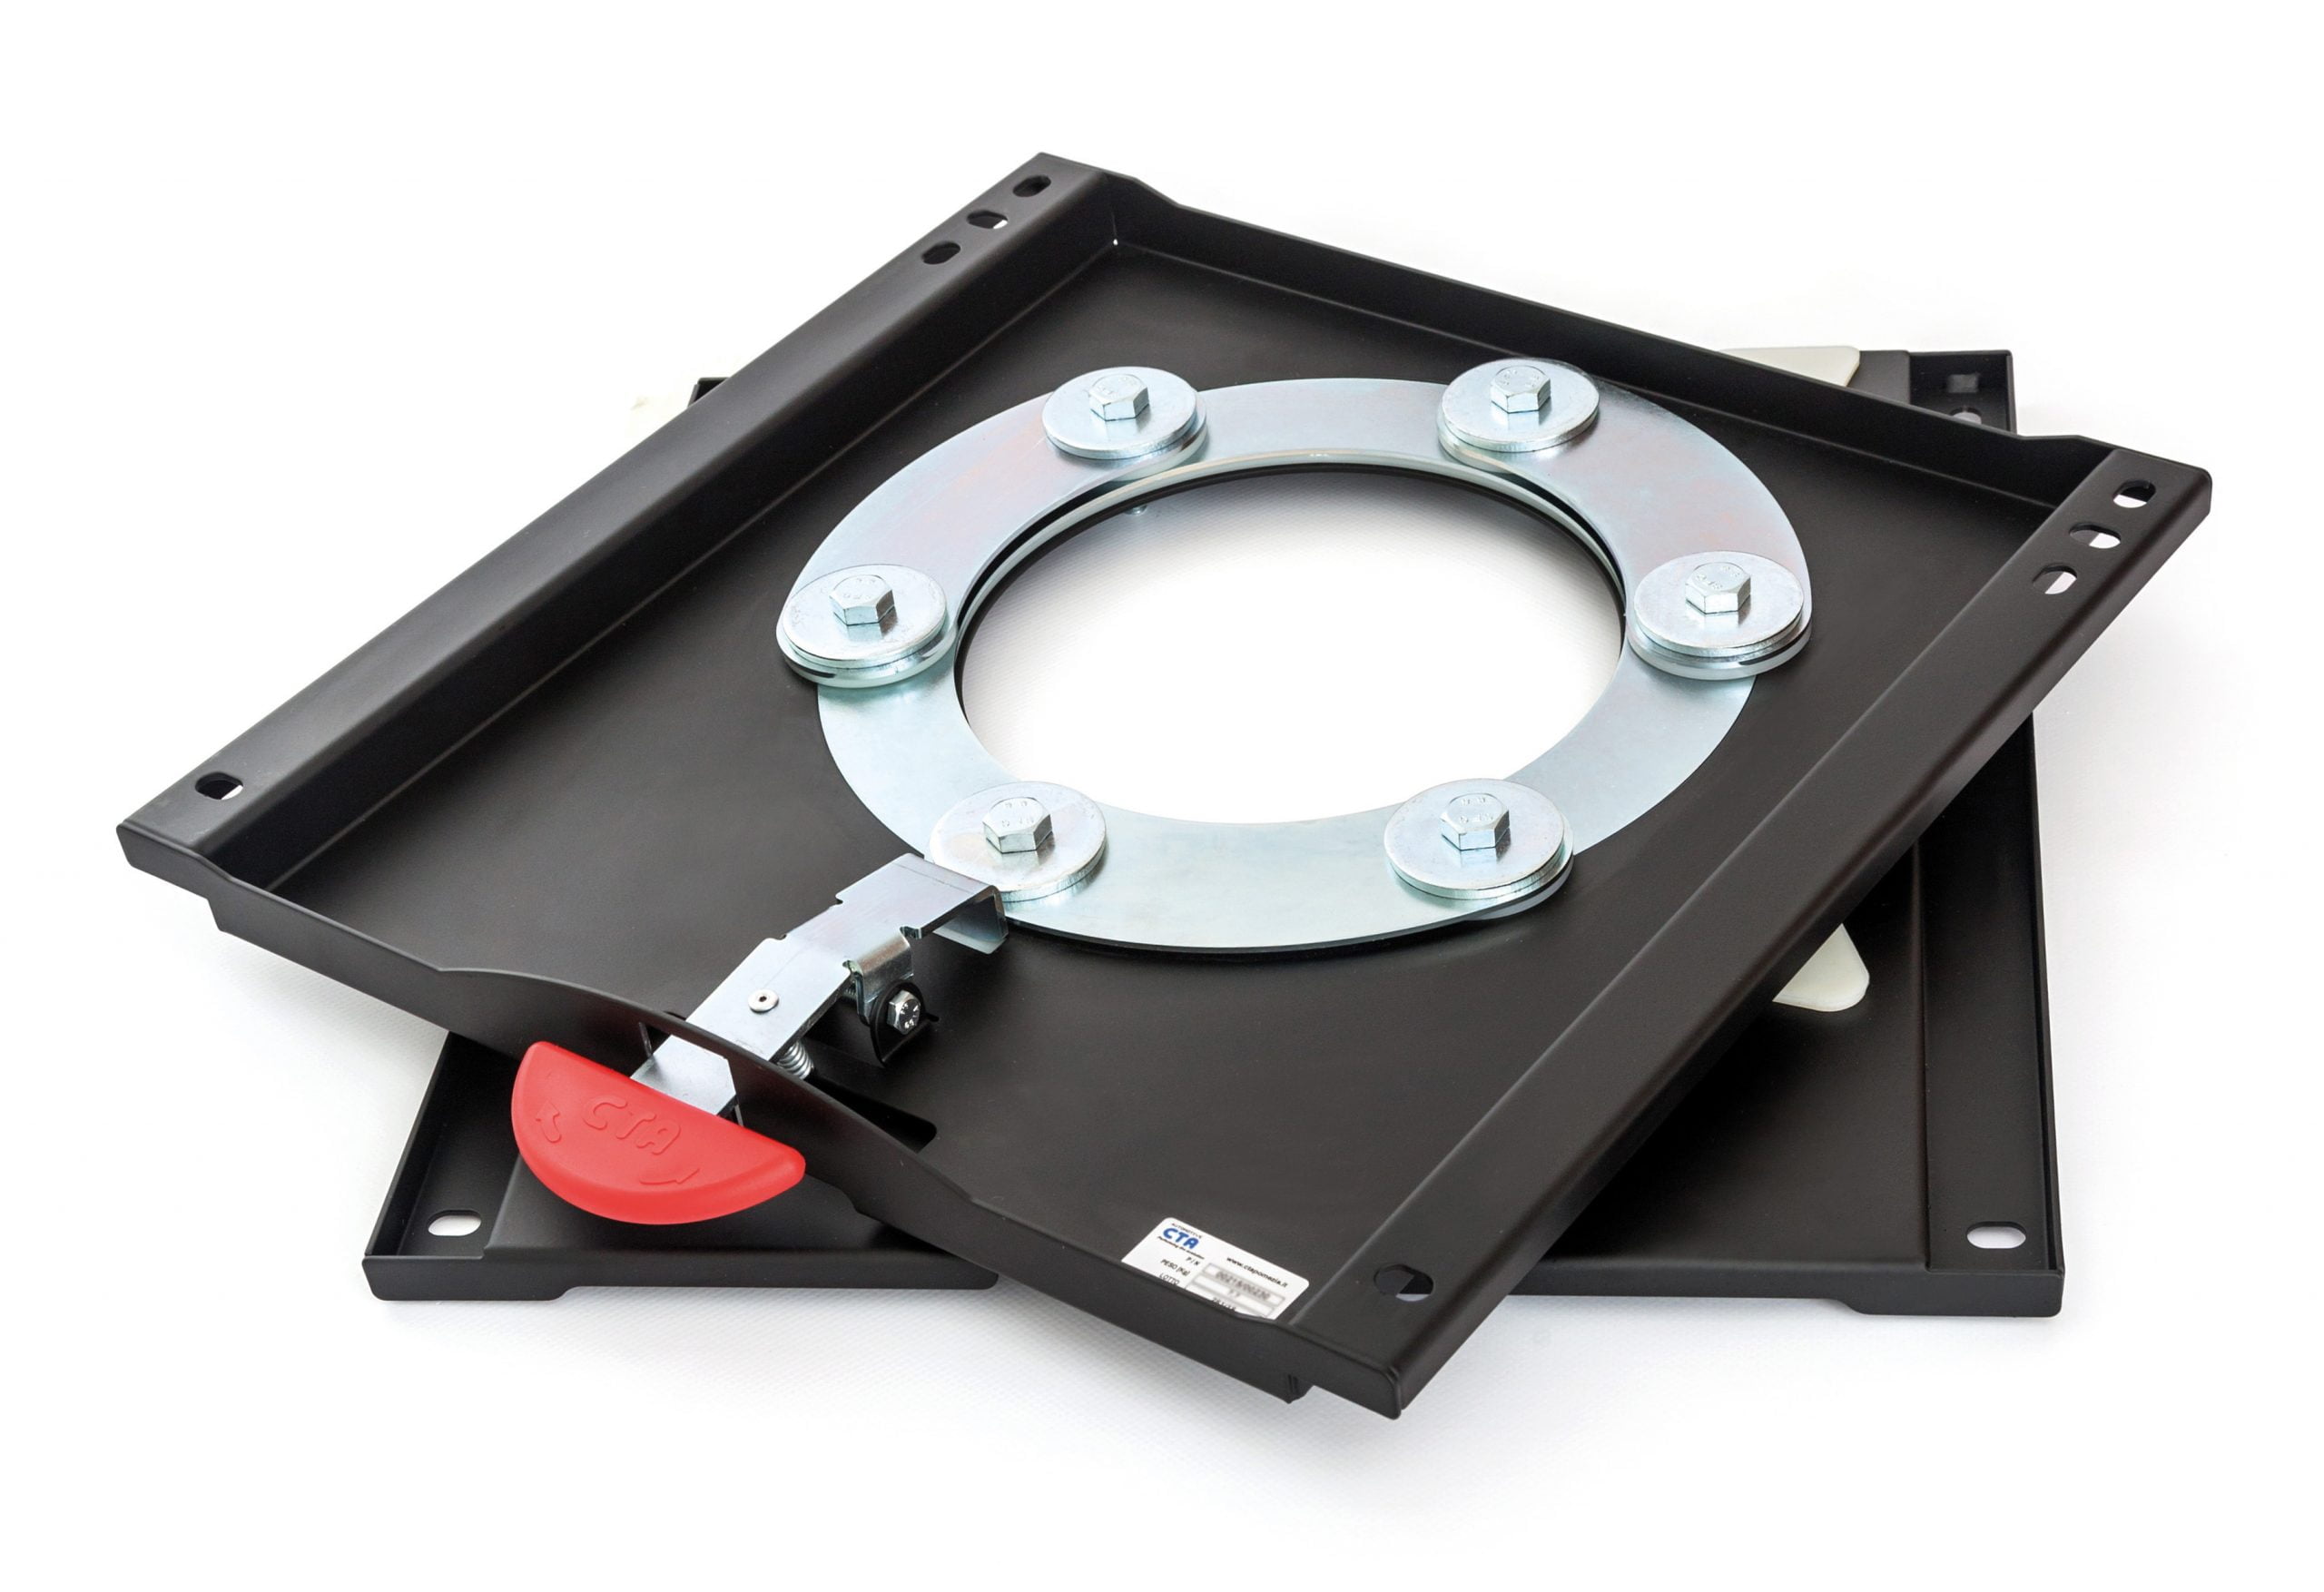 |
Swivel Seat Adapter I have used both the Sportscraft and CTA swivels in my vans. Honestly, both work well but I prefer the CTA swivel for a few reasons. First it’s universal – the same swivel works on both the passenger and driver seats. Then, when you go to swivel the seat, I find that the CTA swivel requires less tweaking of the seat position. Finally, the CTA swivel seems to have less “play” and rattling when on the road. |
opens in a new window |
4-Port USB Outlets This is a great way to add more charging ports to your rig. I like the way I can pair it up with a 120 volt AC outlet and use one single faceplate. |
opens in a new window |
Combination 2-Port USB and Cigarete Lighter Outlet Similar to the USB-only outlet above, this is a combination of USB and a cigarette lighter outlet. |
opens in a new window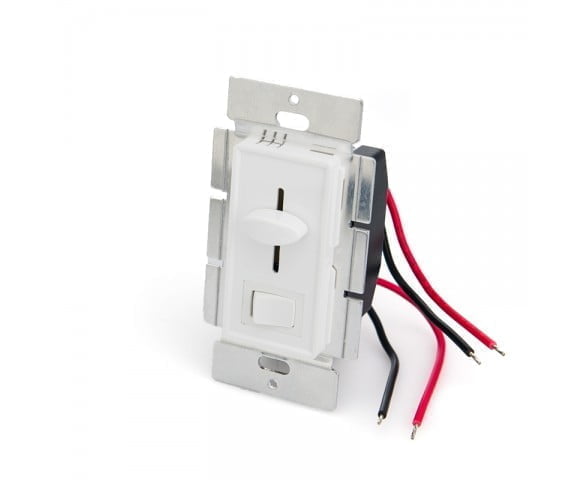 |
LED Light Dimmer Switch Nice looking LED dimmer switch that works well too! |
opens in a new window |
LED Puck Lights Great way to add lighting throughout your van ceiling. |
opens in a new window |
Gooseneck LED Lights These are a great option for lighting near your bed area which is where I installed mine. They are touch controlled for both turning on and off as well as dimming. They come with a power supply designed to be plugged into an outlet in a home but you can simply cut off the connector/plug on the cable coming from the light and wire that diretly to your 12 volt DC wiring. |
opens in a new window |
Small, Double Towel Bar Surprisingly hard to find something that is van-sized and has two bars. So, here it is! |
opens in a new window |
Car Seat Organizer These work great on the back of the driver and passenger seats to add more storage without taking up too much space. |
opens in a new window |
Folding Cup Holders These cup holders are awesomely designed. They fold up out of the way and the “arms” adjust to the width of the cup. I have one on each side of the bed and also use one to hold my bluetooth speaker. Highly recommend. |
 |
3M Thinsulate Insulation I used Thinsulate insulation throughout the van along with some Great Stuff (expanding foam) in hard-to-reach places. There is much debate on what is the best insulation method. I’m quite happy with the results of the Thinsulate. It was amazing how much reduction of road noise this created. According to the vendor, Hein, who is active in the van conversion community, you need about 50 linear feet. So, this is an expensive approach for sure but it goes up really easy. I did the entire van in a day. I used 3M 90 spray adhesive to attach the Thinsulate to the walls and ceiling. I also used Noico sound deadening mat on the van walls/ceiling and wheel wells before insulating with the Thinsulate. |
opens in a new window |
Curt Class III Hitch for the Promaster – 2″ Receiver This was much easier to install than I thought. Took about an hour. I used this kit for the wiring. |
opens in a new window |
Zinus 6 Inch Ultima Memory Foam Mattress This is a super comfortable memory foam mattress that I’ve used in a few builds now. On a Promaster van, the “full” size fits well in the rear on a platform bed going across the van from the passenger side to the driver side without any modifications. In fact, it has just enough squishy “give” that it works around the curved corners of the Promaster where the side walls meet the rear door area. |
opens in a new window |
Richter 445 European Style Mesh Pocket I used these “mesh pockets” on each side of the bed/loft area. They’re adjacent to some USB charging outlets and are the perfect size to store you phone/mobile device while charging at night and a few personal items like glasses/etc. |
opens in a new window |
Mesh Map Pocket This larger mesh pocket is is mounted on the wall that forms the bath/shower just below my gauges/panels and is perfect for maps/notebooks. |
opens in a new window |
Mesh Oranizers The final thing in the “mesh department” are these organizers which I fastened to the galley wall that is directly behind the driver’s seat. I used a few of them here and they’re super handy for things like binoculars, frisbees, flashlights and other miscellany. |
opens in a new window |
Kikkerland Rhino II Step Stool This clever step stool folds up super small – enough to stow away behind the toilet in the bathroom and I use it to get in and out of the van, up into the loft area and as an “extra seat” up against the bathroom wall adjacent to the slider door. Very handy item! I have a special “slot” to store this in the cabinet under the refrigerator. |
opens in a new window |
Dicor Self-Leveling Lap Sealant (4-Pack) This is the stuff I used to seal up all the things on the roof like the vent fan and solar panel brackets. Everyone swears by this stuff and so far it’s held up great! |
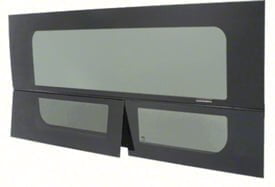 |
C.R. Laurence FW395R Sliding Door Window Installing this window into the sliding door (which didn’t come with a window from the factory) was one of the first things I did. It’s terrifying to cut a giant hole in a new van but I figured it would be “downhill” from there if I started with that! |
opens in a new window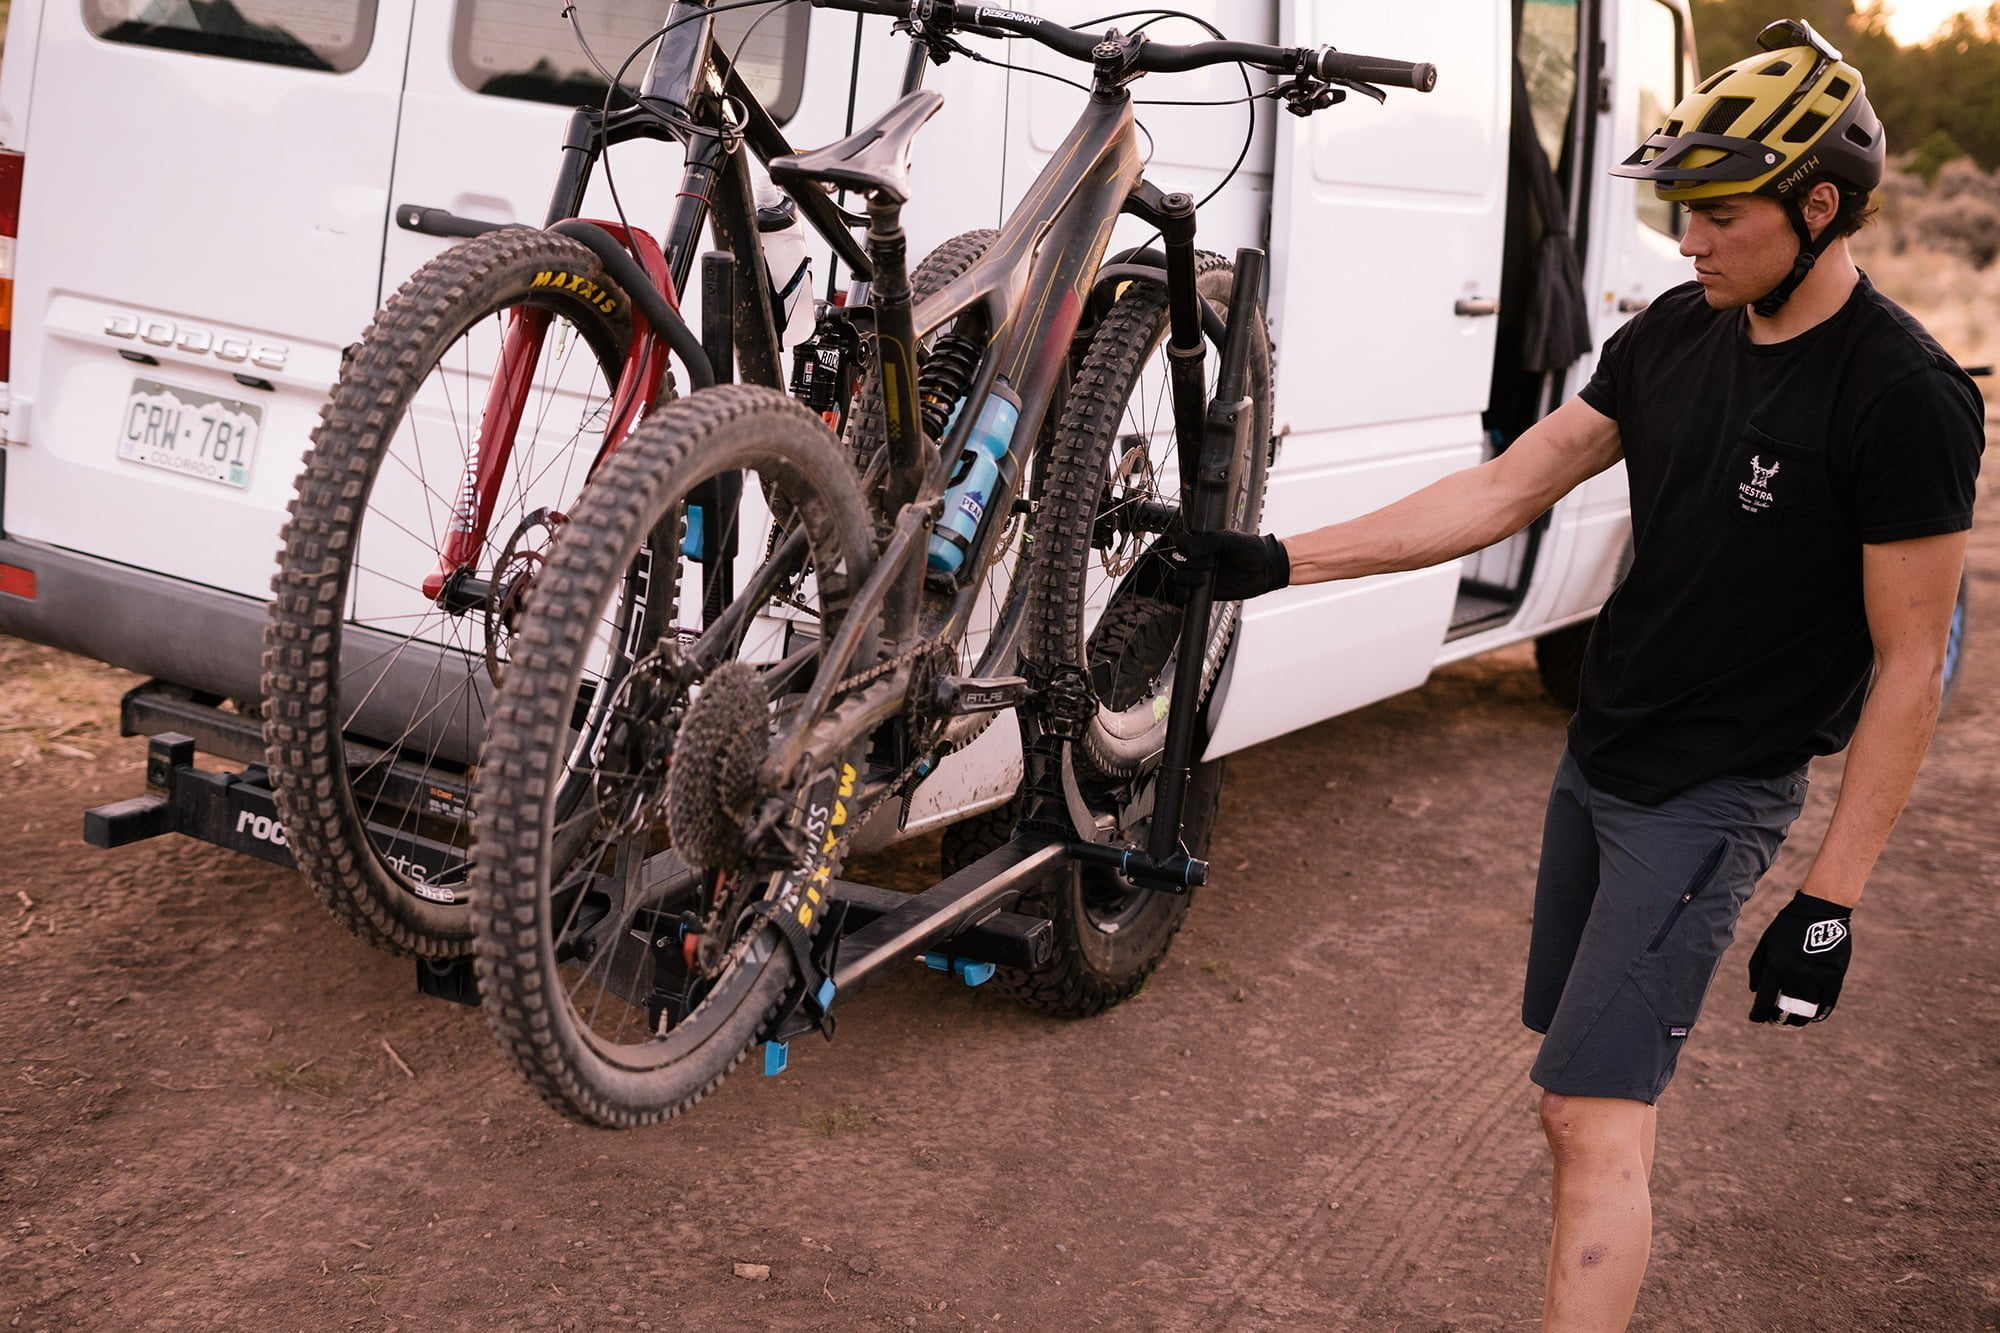 |
RockyMounts BackStage Swing Away Bike Rack This is an excellent way to carry two bikes using your hitch. It combines both the swing away functaionlity that allows you to open your rear doors with the bike rack itself into one high-quality product. I had made my own version of this with a Yakima swing away adapater and a bike rack that was not nearly as elegant as this combined solution. |
| Products That I Did Not Use But Seem Awesome I’ll be adding to this list regularly as I research and discover things! |
|
| 8.5′ Telescoping Ladder | I’ve seen many people use these ladders to get up to their roof for tasks like cleaning your solar panels for increased output, etc. Some day I would like to find a way to store this easily. Perhaps on the back doors. |
| Mabru RV 12000 Air conditioner | Most rooftop air conditioners run off 120 volt AC power and are very power hungry making them impractical to use for any significant period of time with out a shore power connection or generator. The Mabr RV 12000 unit is a really great alternative that uses about half as much energy. I have blog post about air conditioning in camper vans here. |
| Small, Corner-Mounted Vessel Sink | I decided I didn’t want to take up any space in my wet bath/shower with a sink – it’s fine for me to use the sink in the galley instead. However, if you’re looking for something compact and attractive, this one looks very good. |
| Laundry POD | I’m intrigued by this hand-powered laundry device. I don’t really like hanging out in laundromats and another van person recommended this unit. Seems like a good solution and small enough to stow away easily. |