Adhesive Note
This blog post details how to install Lonseal flooring using the company’s recommended 650 epoxy adhesive. That adhesive is the highest performance option but it’s also significantly harder to work with and much easier to screw up largely due to its epoxy nature including the relatively short (30 minute) working/pot time. While we can’t recommend NOT using the officially recommended product, we can warn you that it is not an easy project and any mistakes you make tend to be highly visible. In other words, it is not forgiving.
Meanwhile, I’ve been installing Lonseal into my camper vans long before we were started selling the products (going back to 2017). In those vans I used Roberts 2310 vinyl adhesive which is substantially easier to use, can be purchased locally, and is less expensive. My current van (as of May 2022) has held up very well for about three years now in all conditions from extremely hot (120 degrees or more) roasting in the Florida sun to extreme cold (-20 degrees) in Colorado along with the radical swings in humidity between these two very different locales.
I’m sure there are some applications where the extra high performance of the epoxy adhesive are needed – perhaps something harsh like the deck of a boat – but, in my camper van, I have not personally seen a need for something more substantial than the standard adhesives. Your mileage may vary!
This short blog post is a high-level overview of Lonseal installation. I recommend that you also read through Lonseal’s own documentation including their Interior Flooring Installation Guide and Vehicle Installation Guide.
Why Use Lonseal Flooring In Your Camper Van
Lonseal is a heavy duty sheet vinyl designed for marine environments. As such, it’s incredibly durable and tough which is perfect for a camper van environment. It comes in a wide variety of patterns/finishes including wood look and “coin” style.
One piece of general advice for flooring in your van is to avoid materials that will have cracks or seams which, over time, will trap dirt or allow water/liquids to seep in. These “plank” floors also tend to develop uneven gaps with all the constant movement and expansion/contraction in a van.
In addition, vinyl is environmentally friendly. Its primary raw material is obtained from the nearly inexhaustible supply of sodium chloride (salt). Its manufacture has a smaller impact than other plastics, produces virtually no dioxins, and relies on fewer oil by-products than rubber. Vinyl is naturally fire retardant, highly recyclable, and products can be easily manufactured to meet strict indoor air quality (IAQ) requirements.

Lonseal Antique & Ivory Wood Look flooring in my Miles Van Camper.
Sizing
Lonseal is sold in sheets that are six feet wide and you determine the length by specifying how many linear feet you need. In most cases 10-15 feet is plenty for a cargo van. However, some cargo vans (like the Promaster) are slightly wider than six feet. Often there is cabinetry or other “stuff” in the van that covers the subfloor so the fact that the flooring doesn’t quite go “wall to wall” isn’t a problem – you simply put the flooring where it’s seen.
If your layout requires you to join two pieces of Lonseal resulting in a “seam”, there are two ways to “weld” the seam together – one uses heat and is considered more difficult and the other is a chemical process. Importantly, Lonsealer is not compatible with Lonseal’s recommended 650 epoxy adhesive because Lonsealer requires seam tape (double face tape) to be used in the seam area to keep adhesive out of the seam. The Lonsealer has a chemical reaction with the adhesive (both the #650 and #813) and requires that the seam be free of adhesive residue. Lonseal recommends using a simple butt seam or heat welding instead.
Lonseal makes a product for the chemical sealing. It sells for $38 and one tube should be plenty for a small space. I have never had to do this myself but this (strange but informative) video details how to cut the flooring using an “overlap cut” and use the Lonsealer product.
Preparation
According to Lonseal, your subfloor must be at least 5/8 in. (15.9 mm) thick. They recommend “exterior grade plywood”. Also, the temperature where you store and install the flooring should be “maintained between 65 – 85 °F (18.3 – 29.4°C) for 48 hours before, during, and 48 hours after installation” and “relative humidity level extremes should also be avoided because of their influence on proper drying and curing of substrate preparation materials and adhesives. General recommended humidity control level is between 35 – 55%.” Finally, the substrate/subfloor should be totally clean and as smooth as possible prior to the flooring installation.
Make A Template & Cut To Size
I typically make a template using “kraft paper” or the heavier duty Ram Board. Once you’re happy with the shape of your template you can trace that outline onto the flooring with a pencil. Be sure to triple-check your orientation!
The Lonseal cuts easily with a razor blade and I find that sharp scissors work best for curves and contours.

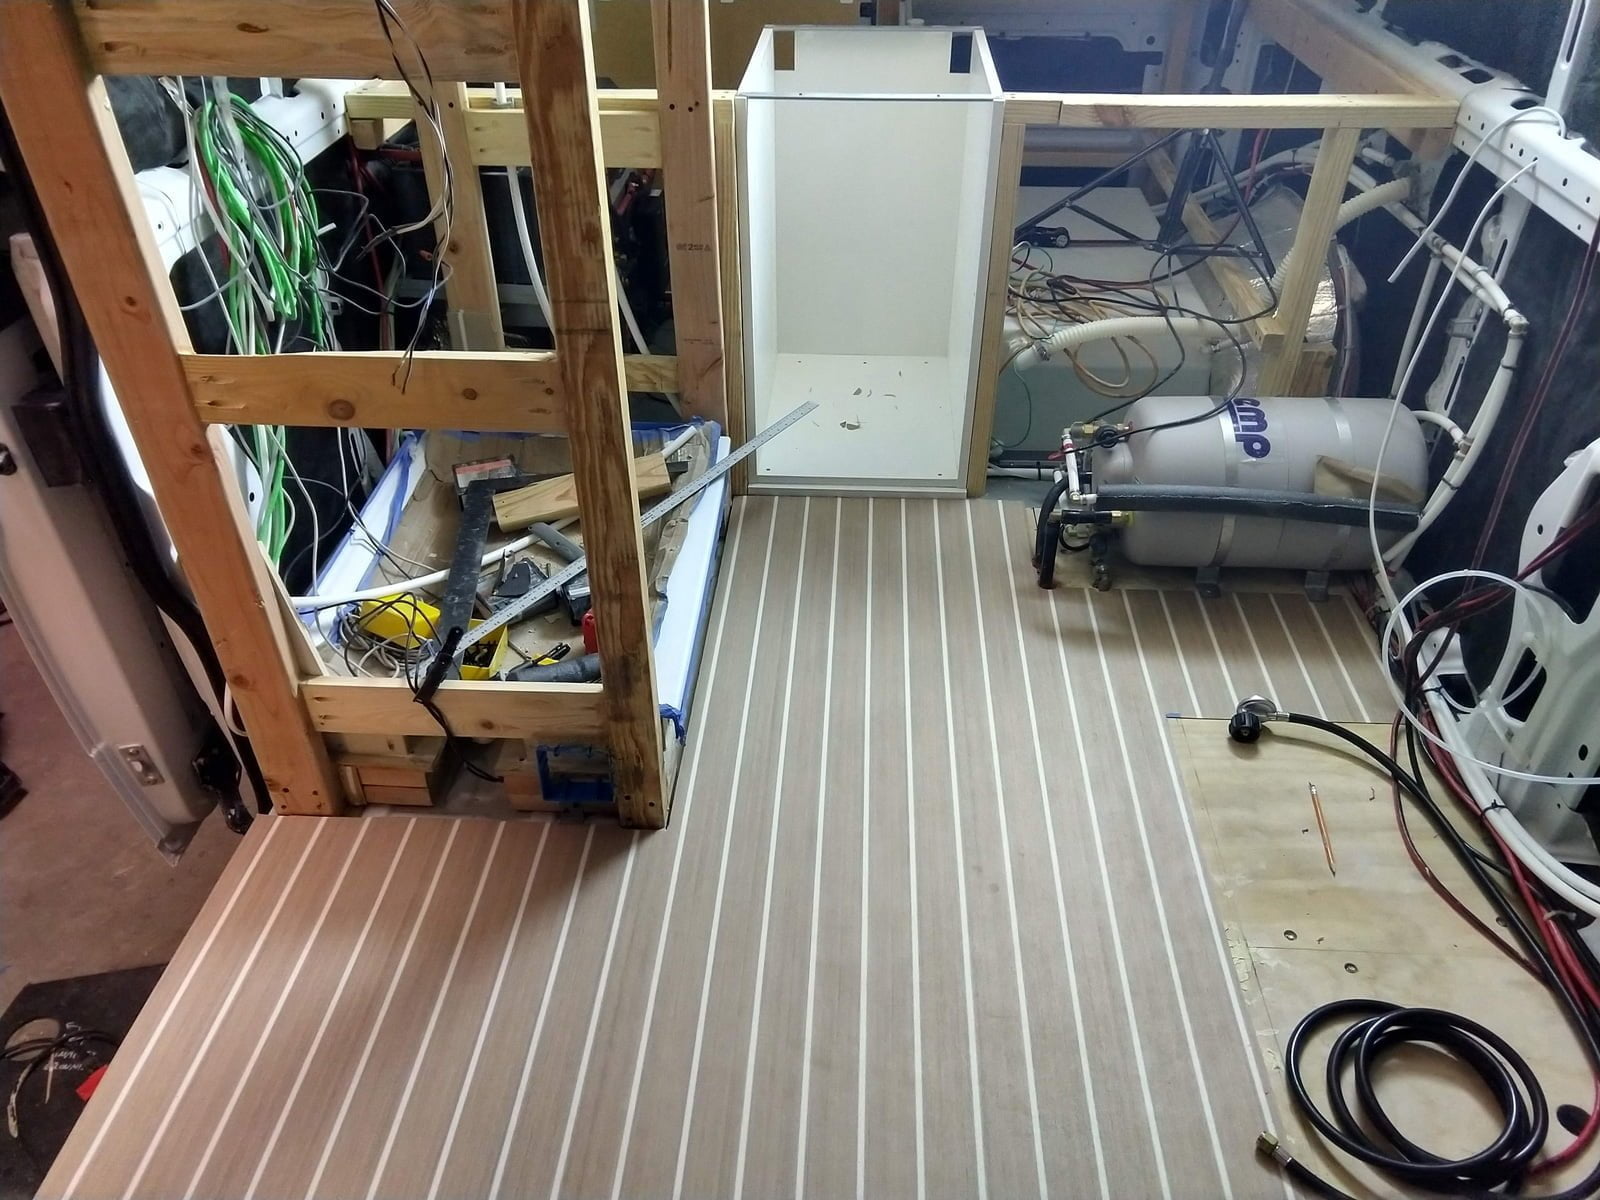
Lonseal flooring cut to size, ready to install.
Choosing Adhesives & Laying The Flooring
OK, here comes the tricky part…
Lonseal recommends their 650 Epoxy Adhesive for horizontal applications in vehicles (floors) and their 400 Contact Adhesive for vertical surfaces. Many people will use coin flooring on walls/vertical surfaces in places like their “garage” area under a platform bed which is an example of a vertical installation.
If you really don’t want to use Lonseal adhesives, they have a list of alternatives (PDF). However, they do caution against using off-the-shelf products such as Roberts 7350 “universal” adhesive because they are typically intended for environments where the temps are between 65 and 85 degrees Fahrenheit. During hot weather the temps inside your van can be well above that which could result in slipping or shrinking of the vinyl.
Installing With Lonseal 650 Epoxy Adhesive
Lonseal’s 650 Epoxy Adhesive is a two-part epoxy and they recommend you mix the entirety of both parts (part A and part B at once in order to ensure the correct proportions. The directions specify that you should use a mechanical mixer at low slow speed (less than 375 RPM) until you achieve a smooth homogeneous mix and to avoid getting any air trapped in the mix which will shorten the working time. That said, I was able to mix it by hand.
I highly recommend that you have someone helping you with the installation. Once you start mixing the epoxy, you only have about 30 minutes of time to use the adhesive (the “pot life” at 73°F is approximately 30 minutes) so do not mix more adhesive than can be used in a 30 minute period and be prepared to move fast and have everything ready to go once you start mixing the epoxy.
Immediately after the epoxy adhesive is mixed, one person can pour it onto the subfloor and begin troweling with a 1/16″ x 1/32″ x 1/32″ u-notched trowel while the other person manages the flooring which can started rolled up and then placed into the “wet” epoxy.
After the flooring is laid, you should use a roller to smooth it out and push it into the adhesive. Lonseal’s installation instructions tell you to use “a minimum 100 pound, three-section roller” which is impractical in a small van. Instead you can use a “three-section laminate roller” making sure you put enough weight behind it to ensure strong, positive contact. After 2-3 hours you should roll the floor again.
You can use ethyl alcohol applied to a clean, dry cloth to wipe up any adhesive residue from the surface of the flooring while still wet. Do not apply ethyl alcohol directly to the material.

It’s often a good idea to place some heavy objects on the floor during the curing process. They recommend that you avoid any traffic on the floor for 24 hours. The complete cure time is listed as 72 hours.
Installing With Lonseal 400 Contact Adhesive
If you’re using Lonseal on a vertical surface, they recommend you use their 400 Contact Adhesive. First you should make sure that whatever you’re attaching the flooring to is totally clean and free of oil/dirt/grease/etc. Then uniformly coat both surfaces (flooring and whatever you’re attaching it to) with the adhesive with a paint brush or non-shedding, 3/8 in. nap roller and wait until the adhesive to become “tacky” to the touch and then then attach the flooring to the surface. Importantly, this stuff is SUPER sticky. Once you attach the flooring to the surface you will not be able to adjust it’s position so be very careful when applying to make sure your positioning is accurate.
Here’s a great time lapse video of someone installing Lonseal Loncoin flooring for a Sprinter van. They did this with the floor outside the van but the process is the same. They use some kind of tank instead of a roller!


