Now that I’ve converted three Promaster vans into tiny homes on wheels I’d like to offer up some recommendations on tools and gadgets that make the process quicker and easier. It’s often said that the right tool for the job makes a huge difference and I agree.
I’m providing links to specific products below but, of course, these are tools that are made by many companies. I’m trying to link to tools that provide a reasonable balance between cost and quality – a good value. In other words, I’m not linking to the “best” or highest quality tool since I’m assuming you are not a professional and won’t be using these tools every day for the next many years. Many folks may have a reason to buy a more expensive and higher-quality brand. So, I would suggesting thinking of this for what it’s intended to be – a list of recommended tools rather than specific product recommendations.
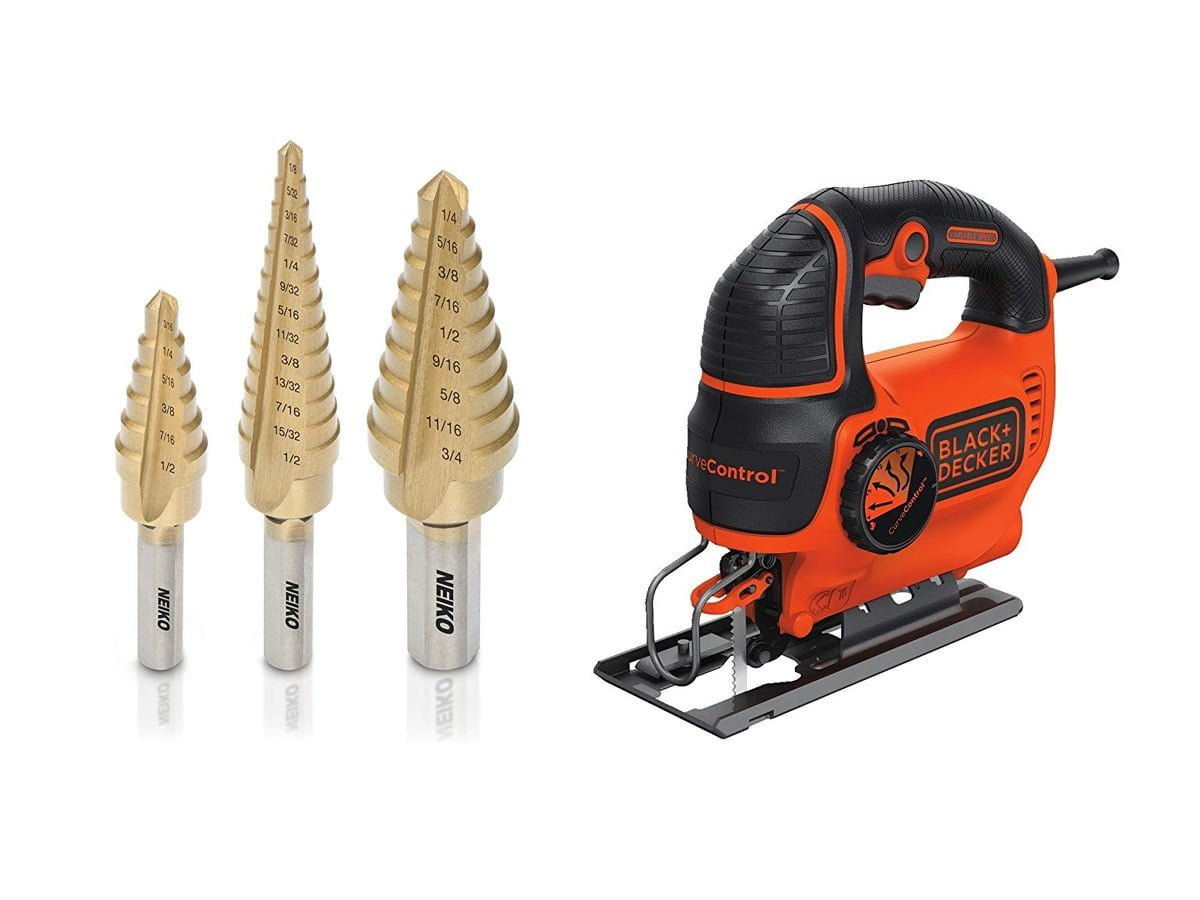
Jig Saw
A jig saw is perhaps the most quitessential power tool for a van build! You’ll use this for cutting all those curves in everything and making giant holes in your van for windows and fans. I recommend some fine metal blades (for those giant holes in your van’s sheet metal) and “down cutting” wood blades that create clean cuts in wood and laminate when cutting from the “top” of the piece.
You need seriously thick electrical cables for things like connecting a battery bank together or powering a large inverter in a van. This crimping tool works great for these hefty crimps like working with 2/0 AWG cable wire.
Heat Gun
Speaking of wiring, you should always use heat shrink on your cable terminations (lugs/etc.). These heat guns really do work better than a hair dryer. Another tool you’ll use a ton and be glad you invested into.
Wire Loom Insertion Tool
It’s a good idea to protect your van’s wiring by putting it inside wire loom. I did this in areas where the wires were exposed to the elements or to areas of the van that might harm the insulation. However, getting the wire into the loom in a total nightmare. These tools make that process so much easier!
10″ Contour Gauge
Nothing in a van is straight and a huge part of building a camper van is making things that fit into all these crazy shapes like cabinets, wall panels, etc. A contour gauge helps you capture these curves and contours with relative ease and are not expensive.
Mini Kreg Jig Kit
This jig for pocket screws is pretty much essential when converting a van. Pocket hole joinery helps you build all sorts things with ease and strength. I also recommend this assortment of pocket screws in varying lengths and, of course, you’ll need a long T20 driver bit to screw them in.
Plusnuts and Plusnut Installation Tool

You can use a variety of tools to install these. The fanciest is a Pneumatic tool but I’ve had good luck with this simpler and less expensive tool which is quite a bit smaller as well which can be handy in a van. You can even use common tools you already have but it’s a bit more difficult. I’ve also seen plusnut installation tools that work with a drill.
I tend to use the 1/4″-20 size of plusnut and various lengths of 1/4″-20 bolts.
A Rechargeable Headlamp
Building a van means working on precision projects in tight, often dark spaces. Inside a cabinet, underneath a van, behind obstacles, etc. I pretty much wore this thing all day during my build. It’s like having a tiny super power!
Impact Driver
There will be much screwing around in your van build. You think that, if you have a drill, you don’t need an impact driver. While that’s true, you’ll be amazed how much better these work for screwing stuff. It doesn’t have to be an expensive one. I bought this particular one which works great and is only about $60. That’s like one penny for every thousand screws you drive. Totally worth it!
24″ Quick Grip Clamps
Another tool I used constantly. I like these larger clamps but it’s good to have a few small ones around as well. From drilling pocket holes to the 10 extra hands you need every day, clamps like these are indispensable.
11-Piece Oscillating Multi-Tool Kit
This was a new tool to me during my latest build and I was actually surprised how much I used it. It was great for cutting openings in plywood for outlets and electronics panels. I used it to cut PVC and hose for plumbing. I used it to sand in tight spaces. I used it to shorten fasteners. I used it just about every day. This kit comes with a nice variety of “blades” but there are even more options available which further extend the utility the tool!
Center Punch
This one isn’t really “essential” but it sure is handy and only ten bucks. You put the tip of this tool right where you need a hole in something (metal, wood, etc.) and press down to “punch” a tiny indentation into that spot. This allows you to start drilling in that exact spot without the drill bit “drifting”. This is particularly useful when needing to drill into metal but these little indentations are also very helpful when putting in screws that might also “drift” without that little “starting point”.
Step Bits
Speaking of drilling, a set of step bits is super handy. These things are designed to enlarge a hole as the bit drills through the sheet metal. Each step on the bit is larger in diameter than the step before. Smaller step drill bits are self-starting and no pilot bit is required to start the hole. On larger step drill bits, you need to have a hole pre-drilled that is equal in diameter to the smallest step on the bit. These bits generally create cleaner holes and you don’t need as many standard bits since the step bit can create most size holes!
A Good Caulking Gun
I’ve used dozens of caulking guns and this is the best one. It’s worth paying a few extra bucks for. Don’t know what else to say. So, there.
Pex Crimper
If you’re doing any substantial plumbing in your van for a sink, shower, etc. you’ll probably want to use Pex for these water lines so you’ll need a crimper. Nothing special here but necessary unless you decide to use something like Shark-Bite fittings. I’d also recommend a proper pipe cutter to get clean cuts on your Pex (and other) pipes.


