Update May 2021. During the Covid-19 pandemic I got sort of “stuck” at my home in Panama. I was planning on being there for about 5 months and then traveling back to my van that I had left at my dad’s house in Colorado. Long story short, the borders closed, the airport closed, the entire world changed and my van sat there for about 13 months.
Hang on, there is a point that has to do with van wet baths… It’s super hot in Colorado during the summers and super cold during the winters. Bad things happened with my wet bath. The plastic material that I used to cover/waterproof the plywood walls bubbled up in many places. My guess is that the heat caused some expansion and for the adhesive to fail. In addition, about 40% of the stick-on tiles had pealed off. It was outrageously cold (defined by me as below 50 degrees Fahrenheit) in February when I first saw all this and I pushed on a sheet of the tiles to put to see if they would stick back and they cracked into pieces like sheets of ice.
So, I was very disheartened and realized immediately that I would have to start over on the bathroom finish. While ugly, everything worked in the web bath so I waited until I arrived in Florida so do the work. I document the “remodel” below in the post and you can skip to it here.
Don’t want to bother with a dedicated wet bath or take up the space in your build? Check out this other post about the Tetravan folding shower system.
One of my favorite features of my Promaster conversion camper (Miles Van Camper) is the wet bath with a shower and toilet. For many people this is just wasted space and they prefer using showers at campgrounds or having a gym membership for showering. For others having some sort of toilet than can be tucked away under a bench when not in use is plenty and others can’t imagine using a toilet in a van at all and prefer to use bathrooms “wherever” they are since they are so plentiful. For us, a hot water shower and a toilet in the van is a necessity. I hate the idea of having to leave the van to take a leak – particularly in the middle of the night. Also, my (amazing) girlfriend has the world’s tiniest bladder and needs to pee all the time (many times a night), so she wouldn’t even consider not having a toilet. It’s also worth thinking about the logistics of using a stowed away loo. When you pull it out do you really want to be in “out there” doing your business with no privacy? Putting the toilet into a wet bath gets around this concern as well. In any case, one of the best things about building a DIY camper van is that you can design it for your personal preferences and how you’ll be using it!
Maybe You’re More of a Folding Shower Kind of Person?
Some people feel like a dedicated shower/bath takes up too much precious space. I love the luxury of having it. the great thing about DIY van conversions is you can design them to your preferences! One clever approach to a compromise is Tetravan’s folding shower system.
You might also be interested in another post that details all my plumbing including a PDF diagram.
Shower Pan
I started by building a frame that the 32″ long by 24″ wide shower pan sits on. The frame itself is slightly longer (33-1/4) to allow the walls to fit into a “gap” that goes below the shower pan (see illustration below).
I wanted the “Hepvo trap” that I used on the shower drain to be inside the van instead of underneath it. This special kind of trap provides the utility of a traditional “p-trap” – preventing odors from escaping from the grey tank – but can be installed horizontally to save space and also has a mechanism that prevents water from the tank from back flowing into the shower pan. If needed, I can access this trap/plumbing by pulling off a “panel” covering front of this shower pan frame. You can see how the frame is elevated off the van floor a bit as well as the access from the front in the photos below. Elevating the shower pan in this way also enables you to determine where exactly you want the drain line to go through the van floor. Often there are obstacles below the van floor right where your drain would be – things like metal framing, exhaust lines and so on. I wanted the shower pan as low to the floor as possible (while still being elevated) so that I didn’t diminish the available standing room in the shower. So, I put this frame directly onto the van floor versus on top of the plywood subfloor. Therefore the subfloor sort of goes around this frame. Every 3/4″ of an inch matters in a van! I also used Noico noise deadener below the shower pan.
Note: the photos below are from my first build. The frame is pretty much identical in my later builds (Miles 2 and Miles v3) but the plumbing is different and detailed in this post.
Shower Pan & Walls Illustration

Constructing The Bathroom
The wet bath “room” is made of three walls: 1) front – facing the cab, 2) rear – facing the rear doors and 3) the back wall – the one up against the passenger side of the van in my layout. The door to the opening (forth “wall”) is a ”disappearing” and self-cleaning Nautilus shower door.

The construction process begins with the “back” wall that is up against the passenger side of the van (behind the slider door). This area of the van is very complicated with many contours and curves. So, the first step is to “even out” this space by using a bunch of wood framing. There is a photo that illustrates this below. The goal is to create a frame that is essentially “straight” for about the first threw quarters of the wall and then curves inward toward as it meets the ceiling.
Once this “framing” was completed, I cut a piece of 1/4″ plywood to be used for this back wall and screwed into into the wood framing. The 1/4″ plywood was flexible enough to conform to the curve of the van but sturdy enough to feel solid.


Next, I glued 1/16″ white plastic material to the back wall’s plywood using FRP adhesive.The material is “Plas-Tex waterproof wall panel” and is made by Parkland Plastics. I bought it at the Home Depot. It’s thinner than standard FRP and less glossy as well. Just a reminder here that this all failed and had to be redone – more on that at the bottom of this post.
The forward and rear walls are framed with 2″ x 4″ and 2″ x 2″ lumber. The vertical framing is attached to the van floor and upper metal “ribs” on the van with metal angle brackets and is also screwed into the shower pan frame. The horizontal framing is fastened to the vertical pieces in several places. This created a 2″ cavity in the walls which was necessary on the front wall for electrical wiring/boxes and the panels for the battery monitor, inverter and tank monitors. On the rear wall, the cavity is used for the hot and cold water lines and shower valve.
Next I attach 1/2″ plywood to the front and rear walls. These walls are “straight” on the side facing the opening/door and curve to meet the “back” wall on the other side. The plywood exends down into the “gap” between the wall’s framing and the shower pan itself (see shower pan illustration above). Then, the same 1/16″ white plastic material was glued onto these plywood walls and also goes “below” the shower pan into the “gap”.
Once all the walls and plastic material is installed covering the plywood walls, I caulk all the gaps and seams between the walls with white Loctite Polyseamseal.
Eventually, the door is installed according to the instructions they provide. That is a simple process but I do recommend using silicone caulking as adhesive on the “cassette” side of the door. It comes with some double-sided tape to hold it up but, in a camper van, I would recommend something more durable. The silicone provides enough adhesive power while also allowing removal if necessary to repair or replace in the future.
Accessories
In my wet bath I have a mirror and bar soap holder on the front wall and the shower mixing valve, shower head and a soap/shampoo dispenser are on the rear wall. The back wall incorporates a waterproof toilet paper holder.
At this point, the wet bath/shower looks something like this:

I decided to go one step further and enhance the style with some stick-on tiles. These brighten up the space and I think they look great! However, they are not waterproof which is why it’s important to use the plastic sheeting and make the shower water tight before adding the tiles. The stick-on tiles are somewhat translucent and quite thin. So, the white plastic and the smooth surface of the plastic really helps the finished look of the stick-on tiles. Just a reminder here that this all failed and had to be redone – more on that at the bottom of this post.
After about 6 months, one of the “sheets” of tiles started falling off. I suspect that I didn’t get that section of the plastic backing clean enough in that spot when I was installing that particular sheet. I repaired this by removing that sheet, cleaning the plastic behind it with denatured alcohol and then replacing that sheet with a new one. I have heard from others that, if you coat the entire walls (all the sheets of stick-on tiles) with polyurethane this helps them stay “stuck”. I have not tried this and I would want to test it on a spare, single sheet to see what it looks like but thought this tip might be helpful to others who are using the stick-on tiles.
Below are some photos of the installation and the finished shower walls with the tiles.


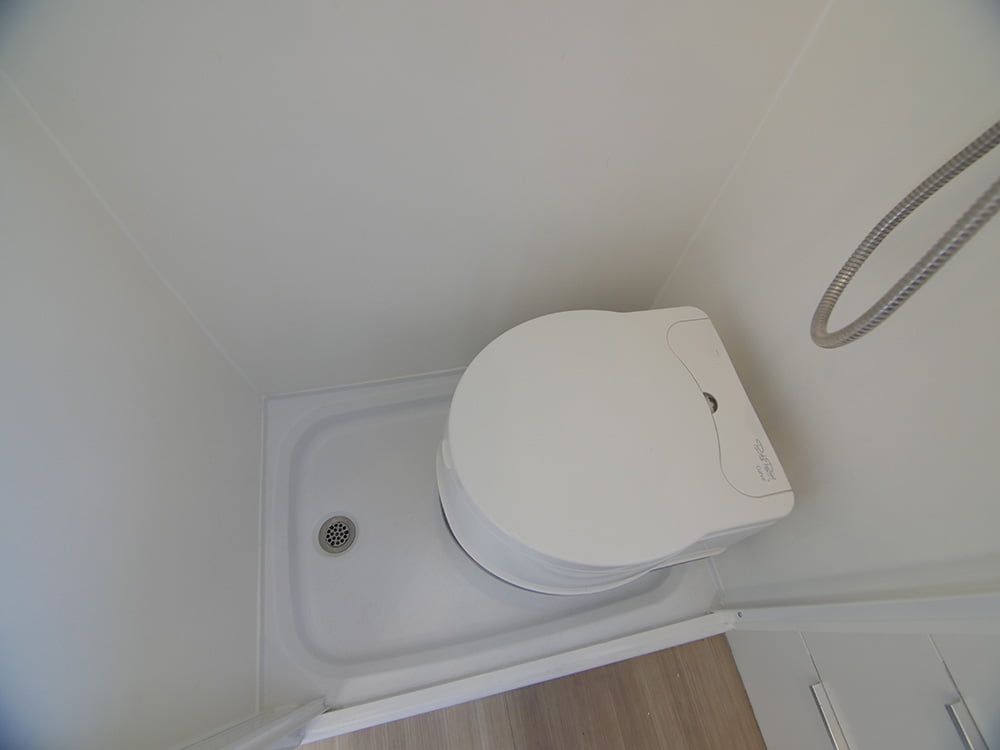
The Toilet
The toilet I used is a Thetford Curve cassette toilet. I utilized the mounting plate that is sold specifically for that purpose. The plate is secured to the shower pan (as far back toward the rear as possible to make room for standing in front when showering) using stainless steel screws. The toilet latches into the mounting plate and can be easily removed from the wet bath area to make more space or to empty.
Our experience with this cassette toilet has been very positive. The primary benefit of a “cassette” toilet is that it eliminates the need for a “black tank” that normally stores sewage waste. This is typically separate from your “grey tank” which stores waste water from the sink/showers, etc. in an RV. Black tanks are typically drained with what is often referred to as a “stinky slinky” – a 3″ sewer hose you connect from your rig’s black tank to a sewer line at an RV park or campground when emptying your tanks. This is no fun.
In contrast, a cassette toilet uses a removable “cassette” as the black tank. On my particular toilet, the top portion is a fresh water tank has water for flushing (there’s an electric pump that dispenses water around the toilet bowel when needed) and the bottom portion is the “cassette” or the tank that holds the waste. When it’s full (there’s an indicator on the front), you simply pull of the “top” water tank, set it aside, and then detach the bottom (cassette) to empty directly into whatever you’re dumping into. This eliminate the “stinky slinky” and is considerably more flexible. Not only can you you can dump into a standard sewer, but you can also use things like a porta-pot or even a standard toilet at a gas station. To be fair, dumping the cassette is no fun either, but, in my opinion, it’s considerably better than dealing with a black tank.
We’ve used this toilet extensively for both “number one” and “number two” and, as long as we use the right chemicals and leave a little fresh water from the flushing mechanism over the top of the “flap” that opens and closes to let whatever waste is in the bowl down into the tank, we don’t ever smell the tank!
Also in the wet bath is a soap dispenser hanging on the wall and a small mirror with a shelf on the front wall onto which the toilet paper hanger is mounted.


The Remodel
I wrote about what happened to my wet bath walls while the van sat through the Covid-19 pandemic. Here’s what I did to fix it up!
First, I pulled the stick-on tiles off. This was really easy actually because the adhesive was garbage and they were already falling off. Right into the trash they went.
Then I had to get the original plastic sheeting off which took considerably more effort! What ended up working the best was using a razor blade and make vertical “slices” from top to bottom about 6-8 inches apart from each other. Then I used a heat gun to heat up the plastic/adhesive and a metal scraper blade to get a small section of the plastic off the plywood. Once I had something to grab onto, I could use the heat gun to heat up/loosen the adhesive for about 3-4 inches at a time and peel it off. This seemed to take forever but I did get it all removed.
After doing quite a bit of research and checking out what other van builders had used in their wet baths, I ended up using “standard” FRP sheets (.9″ thick) on the plywood. I cut them to shape using a jig saw using a fine-tooth blade and glued them into place with FRP Adhesive which I applied very liberally! In addition to being a bit thicker than the original plastic that failed, the FRP is much “sturdier”. I actually like the look of the remodel better than I thought I would.
This work was done in May of 2021 and it’s about to undergo the “Florida Summer Test” where the van roasts over the course of the Florida summer. I’m really hoping it doesn’t bubble up and stays up in place. If it can survive the “Florida Summer Test”, I think it’s going to hold up well in general. I will definitely update this post once I know how things turn out!
Update May 2024: the FRP has survived many summers in Florida with no problems at all!
Below are some photos of the “remodel” and the new FRP installation.


